
This has quickly become one of my favorite event sites for reenactments. It is a replica of the Lewis & Clark fort at Camp Dubois in Wood River Illinois. I've spent weekends in the cabins before and I knew that there was a forest recently ravaged by beavers. I came prepared with lots of wood working tools hoping to collect some wood for various projects.
At the top of the list were two projects: 1) Pole Lathe 2) Shave horse.

I walked around the pond in the region which had been ravaged by the beavers. As it turns out many trees were felled but none were of use for what I needed. All of the wood was either too old and rotted or too narrow.
What I did find was some huge stumps in the center of the camp. These stumps were dropped off with the intention of using them as part of a huge bonfire. Not all of those stumps would make it to the blaze.
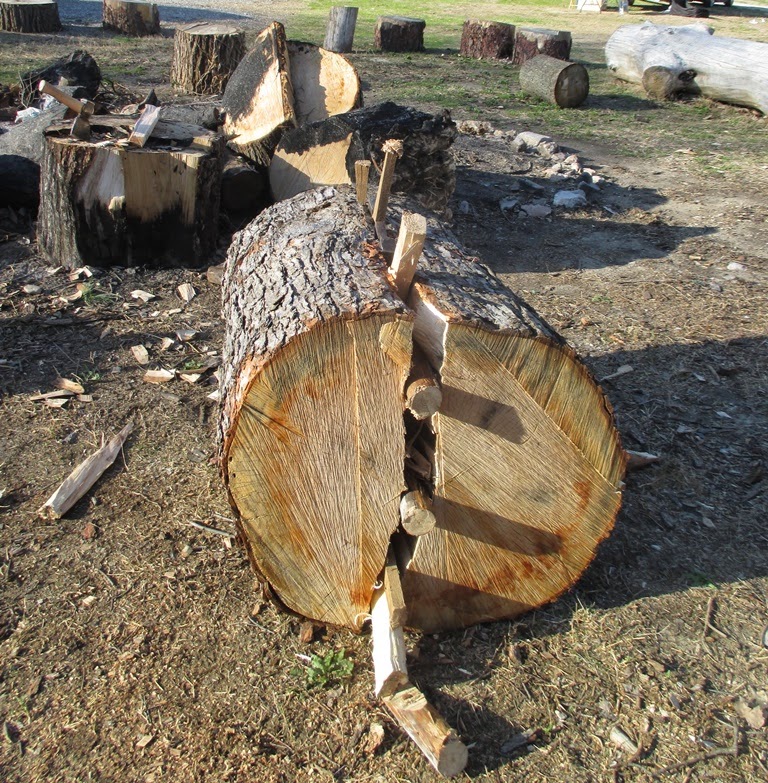
In particular this large stump of silver maple caught my eye.


To begin the wood working adventure I started making some gluts. Those are wood spikes to aid in splitting the timber without burdening the metal spikes. I brought 4 metal spikes but these stumps were huge. I planned on starting the split with the metal wedges and then finishing it off with the wooden ones.


xxx


Car loaded with the new project wood. I came down with some wood expecting to use it in the event that I was not able to find anything. As it turns out the ash and elm I brought lost their seats on the ride home. The maple and osage were much better company. I'll need to scrounge again for some more wood for the legs of the lathe though. Just didn't have space in the car after all the clothing and tools were packed on top.

At the end of the weekend I was more tired than I have been in many years. I was physically exhausted having used muscles not used in many years. My hands and feet suffered a bit as well. Eight blisters and one cut. The cut and the largest blister festered after getting infected and didn't heal for 10 days. I also stepped on a nail while digging through the wood pile. It only went about a quarter inch into my foot, but that too got infected. Had to lance it and bind it. In hind sight... I'd do it all again. A great weekend of fun!


Here is the chunk of maple roughly planed to shape. At this point I planned to hollow out the center but needed to work both sides of the board to determine which side would work best.


Some rough measurements before I proceed. I didn't have a formal plan for this project but rather a vague idea of the design in my head. I had to let the material guide me in the design. I had to work with the size of the wood that I had available.


Here you can see the basic layout for the cheeks of the lathe. While some of the period lathes I have seen in diagrams have one static cheek and one movable I chose to make both of mine movable. This is basically for portability and not for function.

Now that my basic layout and size has been established I cleaned off some of the edge. I don't need a completely true and square side I would like one side to be straight. I used a hand saw to cut a thin strip off the length to true up the board.


Probably not my best day. I took a chisel to begin the hole for the center section. In hind sight I should have used an auger or taken more time with the chisel. I was in too much of a hurry to get through this phase and I really don't like the outcome. After the center piece is removed I will clean up the ends with a chisel later.


Center section of lathe removed with a saw.


Roughly cut the cheeks to shape to fit into the slot of the lathe body. I cut these a bit wide so that I could use a hand plane to true them up and fit snugly.


Satisfied with the progress of the lathe I moved on to my next beautiful chunk of wood. I plan on making a few hand planes from this chunk of Osage orange.


Used a small axe to clean up some of the rough pieces and get the piece "flattish" so that I could rip it into pieces.


I really want one huge jointer plane. I wanted to use a hand saw to rip the piece as close to straight as possible. I found that ripping Osage with a hand saw to be crazy tough work. You can see that the rip cut slowly followed the grain and had a bit of a curve to it.


I should have measure the time it took to do this. Great exercise if you old and out of shape like me.


Roughly blocked out. I continued this process to make two possible pieces. I'd like one really long jointer and one or more smaller planes. I will start with the big boy first and see how tough the wood is to work with.


Interesting to this post.
Battle of the tools both present and past. The past won.
I was ripping the Osage and found that the blade started to bind. I was a bit lazy and grabbed the first thing at hand to wedge it open. I grabbed the axe you see below. I tapped the axe into place using the modern cheap hammer you see on the left. As I have said, Osage is tough. I tried to drive the "wedge" in just a bit. I wasn't trying to split the wood so i wasn't hitting very hard and yet my hammer shattered. I have never seen or heard such a thing. The axe was so hard that striking it with the hammer just cracked it like glass. The sound the crack made was that of a piece of pyrex being dropped and broken. Very odd high pitched sound for a piece of metal to make. The cast hammer head must have been very brittle and as you see... it just died when faced with a tool of the past.
