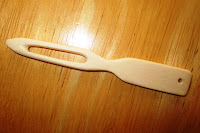
Here are some pics of the piece that I broke the other day. Ugh!
The end is now in sight. The tweezer detail work has begun. That piece is the last piece with a significant amount of work left. I used a power drill to make a series of holes along the piece.
Side project... Went out to eat the other day and had some chicken at Hooters. Yum. While digging through the bones I came across about eight bones which sparked a project interest. I boiled them, scraped them and then cut the ends off. I scooped out the marrow and will now set these aside until my other pentathlon projects are done.
Detail work progressing. This part was done with pin files. I took a round pin file and connected the holes I drilled and then used a flat file to keep opening and evening up the hole along the way.
After the piece was satisfactorily balanced and symmetrical I used a small hobby saw to hand saw the slit in the end of the tweezers. I then used a flat double sided pin file to smooth out the piece. This pic was a sample of how the pieces would look and feel when mounted. (Note this was before I cut the tweezers, got a bit ahead of myself on the description.)
Not sure exactly how I would connect the pieces I toyed with a few ideas. At first I cut out a bone in a shape of a U. That was a fail. As I was roughing out the piece I dropped it and it quickly cracked in two. Bummer. I had another idea, rather than mount the pieces on a ring of copper or brass as some others have done, I would use a single straight rod and cap each end with a peened cap over a disk of antler or bone. I fashioned these two disks from a small piece of deer antler.
Yup, they look dirty, ugly and too big. The idea looked better in my head than they did on the final piece. I suppose the ring approach is back in play. That may be whey that is the only technique I've seen used... because it works.
Tweezers cut, pieces smoothed up a bit and almost done. Probably got another 3~4 hours of polishing and burnishing, but the majority of the work on these pieces are done.
Here was my first test at a hoop to hang the tools from. I knew that I wanted some sort of twisted wire, but wasn't sure how thick I would need it to be. After this quick test I could tell that I didn't like it and would have to try a thicker wire.

Here is my second attempt. Rather than just twisting a single color I opted for a two-tone hoop. I used a twisting pattern and closure that I have seen on earlier period Viking style jewelry. After a bit of twisting a I hammered the wire and filed it a bit to make it smooth.
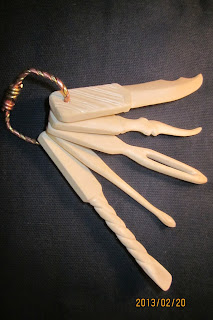
And, here is the finished hoop. I squared it up a bit so that the tools lay flat when not in use. The curve is slight enough so that the tools can easily be swung around to get out of the way. All in all I am very happy with this set and there isn't much different I would do if I had to restart again.
Oh, and by the way, these are the broken teeth from the comb I messed up. While at a friend's house for a guild night, I cut the teeth apart and gave her one to work into a needle. I'll probably make two needles out of the bottom two in the picture.


