Pages

Showing posts with label quiver. Show all posts

Sunday, February 2, 2014

Medieval Bag Quiver

On a snowy day after the driveway has been cleared off twice and the wife and kids are out at a friends birthday party what does Daddy do?  Well, gotta be a "project" of some sort.  After finishing a half dozen projects lately I was at a loss of what to work on next.  I muddled some ideas around and then I finally decided rather than starting another project I might finish an old one.  I decided to finish the Bag Quiver that I started working on in the summer of 2012.  See post (Bag Quiver) for further details.

Started with a heavy weight piece of linen.  This has been in my stash a while so I'm not sure where it came from, but I think it was a Hancock Fabrics purchase.
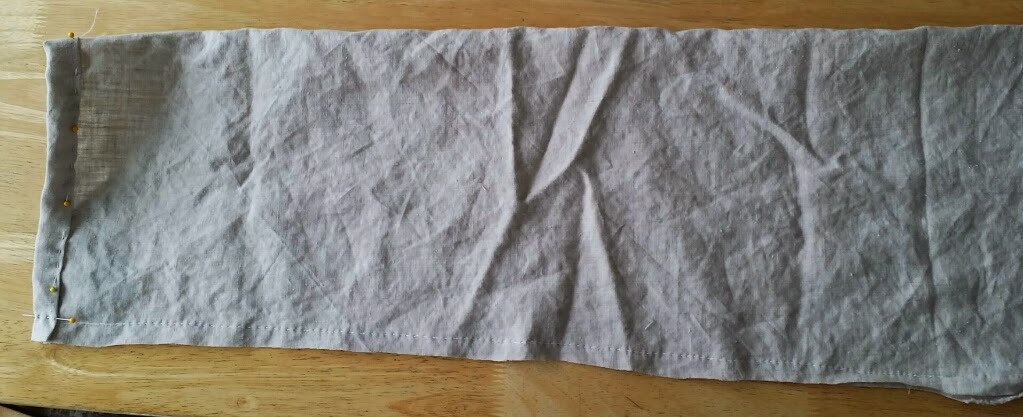

On the image above you can see that on the left the opening is about 1.5 inches narrower than the opening on the right.  The left side will be the bottom of the bag.  I ran a seam down the side using a running stitch.  I know that this seam will not be under tension and doesn't need to be pretty so this was just a quick and dirty seam.  I then trimmed the edges leaving .5 inches on one side and .25 inches on the other so that I could fold over the seams and flat fell them.


Pinned and ready I whip stitched the flat felled seam closed.

xxx


I had to allow for a closure both at the top and the bottom.  I planned on either using a leather thong or a small rope to close the bag.  I also rolled the edges which were exposed at the top of the bag opening.  I find it easiest when doing a whip stitched seam to simply fold over and whip stitch loosely.  When you open up the fold you have a neatly flattened seam.

For example:
 

If you whip stitch loosely when you open up the fold you hemmed edge is hidden nicely and from the right side you see very even, small, straight stitches.


This was the plan.  As you will see later I left the opening at the top too large and had to close this opening a bit for fear that my arrows might fall out even when the bag was closed.


Here is a technique I used ALL the time when hand sewing.  I sit at the table and pinch a section of the fabric between my stomach and the table.  I simply lean onto the fabric to provide tension.  I then pull the seam with my left hand and stitch with my right.  This allows me to hold the seam flat, straight and provide consistent tension when I tighten my stitches.


This was not part of the original plan and I have no historical basis for it.  I imagine that most bag quivers were used to simply transport large amount of arrows to the front line.  I don't really believe that they were used, over and over and over again to carry a couple dozen arrows to the archery range.  In any event I was worried that the linen would weaken and begin to develop holes at the bottom of the bag from use.  As arrows are dropped into the bag over and over they might start to pierce the bottom of the bag.  I decided to take a scrap of wool which was literally on the top of the garbage pile from last weekend's project.  I cut the wool to a roundish sort of shape in hopes tht when the bag was closed it would provide enough cushion to ease the points in without damaging the linen bag.  Only time will tell.


From the outside after the wool was stitched into place.


Here is the leather spacer I finished about a year or so ago.  I added a heavy weight linen stitch around the edge.  Again, no period example of this.  To my knowledge only the extant leather portions exist today so the manner in which they were attached to the bag is purely speculation.  I decided to add this running row of linen to allow me to then more easily stitch the bag to that edge-work.  If I were making hundreds of these for carrying arrows to battle surely I would not have done this.  I would have probably stitched the leather to the bag with as few steps as possible.  I want my bag to last from use though so long term durability was a concern.


After pinning into place to ensure proper spacing I then ran a simple whip stitch from the linen bag through the loops of linen thread.


Completed attachment.


I then pulled the bag top over the leather and smoothed out the folded edge just stitched.  The result is only a series of small stitches from the outside but the leather spacer is very securely in place.


After trying a few versions I ended up mixing.  I know that in period the bottom of the bag opened so that the arrow bag might allow the archer to simply pull arrows from the bottom for use.  I don't really envision me opening and closing the bottom of the bag often so I wanted a very tight and secure closure.  I found that the leather thong provided a better closure and a more appealing look.  Frankly I just liked it better.  I went with about 1/4 inch hemp rope for the top of the bag.  I wrapped the end of the rope with linen thread to keep it from fraying.


Here you can see the space where I left a large opening.  I ended up stitching the opening about 80% of the way up.  Next time I should probably measure and do a mock up.  This project was sort of a snip and rip guesswork sort of thing.


You can see that I left the rope for the top closure a little long.  I did that on purpose so that I could take one end of the rope and use it to tie to the bottom.  This would allow me to make it into a shoulder bag in the event that the archery range (at Pennsic) is a long freaking walk!


Here you can see what the bag might look like loaded.  At the moment I have only carbon and aluminum arrows.  My next project is to make some proper wooden arrows to fill the bag with.


Tied for use as a shoulder bag and ready to head to the range.

Monday, April 15, 2013

Quiver Finished!

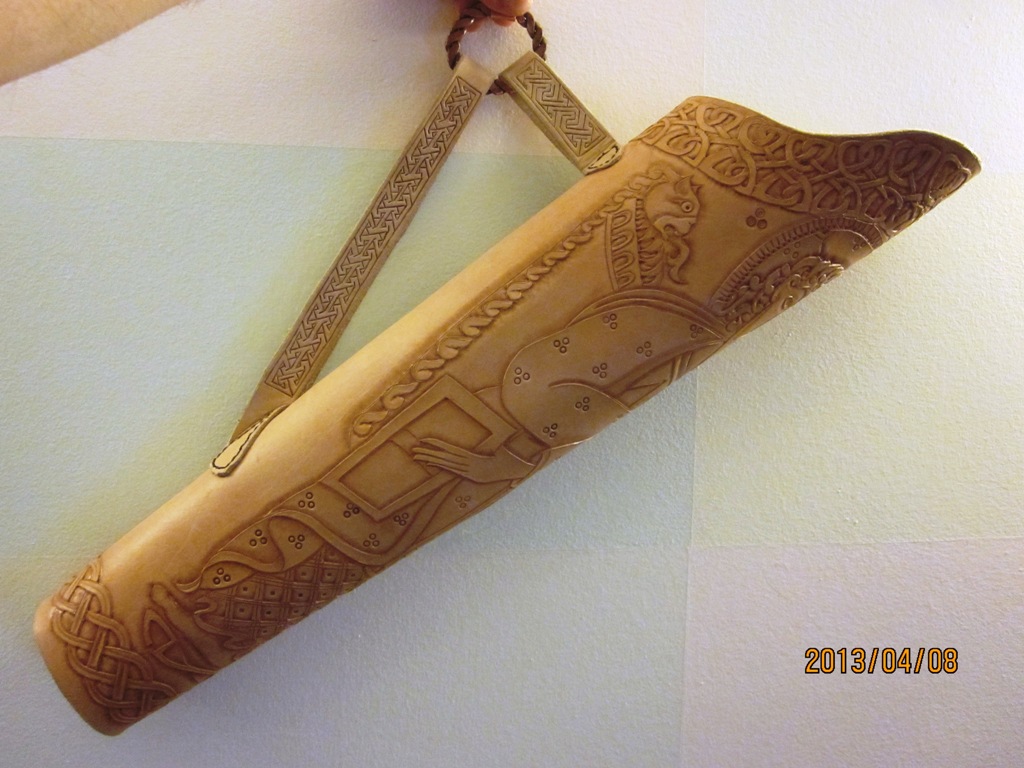
I've been working hard to press along and finish this project before the A&S competition so I've been snapping  a lot of pictures, but not posting them.  I am now done with the quiver!

I don't know what is wrong with this Blogger, but it seems to like to rotate my picture randomly.  All look fine to me when I load them, but when uploaded to blogspot, they get rotated.  I don't have time to fix them all this time, so enjoy.

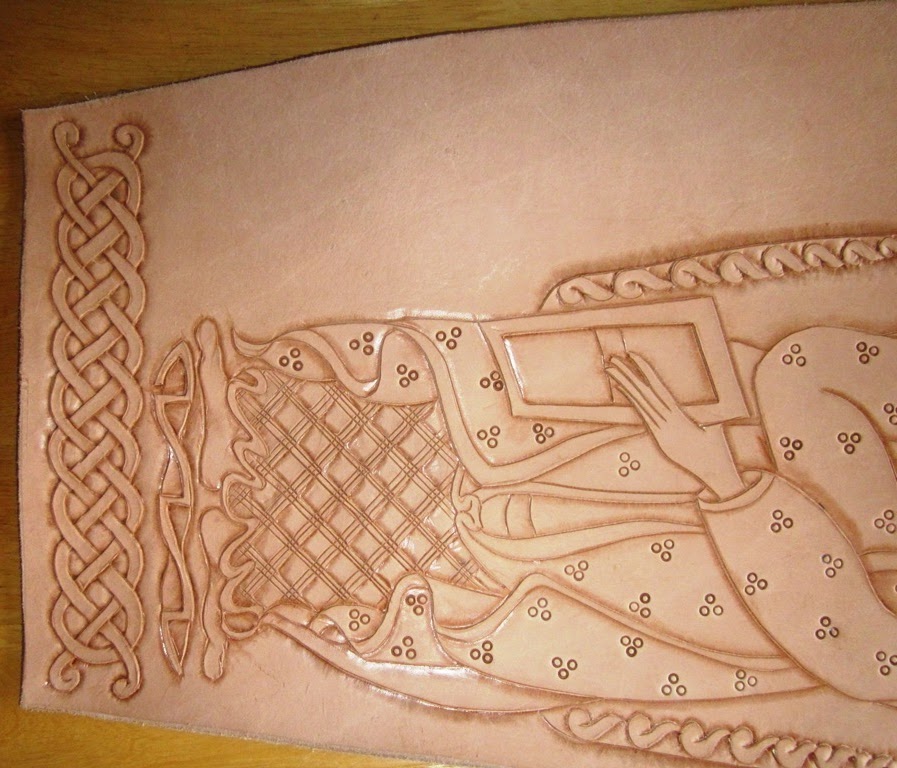
Beginning the process I scored along the lines which were marked from the tracing of the image off of my sketch.  The following series of pictures are simply the progression of the process.


Here you can see the beginning of a deformity in the leather.  I really started to appear when I wet the leather to start cutting/tooling.  It begins at the upper right portion of this image.  Oh well.  Too far along in the project to start over with a new piece of leather.  I wasn't sure it would matter much on the finished project, but as it turns out it was the first thing commented on when I showed it to a fellow leather worker.


Tooling is basically done at this point.  I planned to come back and clean some edges up a bit, but my next big step had me shaking in my boots.  I had never really stitched leather like this together before.  I knew I wanted to butt the edges together as I had seen on other period project, but I had never done it before and was really afraid that I would mess up the whole project by stitching it poorly.  The following pic is the small amount of practice I did before stitching the finished project.  This is the only test stitching I did.  Prior to sewing the quiver, this was the only use of this stitch I had ever done before.

I scored a line along the edge and then used a commercially available wheel to mark the stitching holes.  I then used an awl to pierce the wholes from the top and out the side.  This stitching appears even and neat and there are no stitches visible from the back.  Good enough for me.  No more practice needed.... lets go!


Here are the edges marked for punching.  The roller makes nice even holes to make the finished stitching nice and neat.  With the thickness of the leather I was working with it took about 4~5 passes to get the look you see in the below pictures.


I debated whether or not I should finish the quiver before stitching but eventually decided to stitch and then coat with oil only.  No dye for this project and definitely no paint.  Here is the first of the two straps which will connect the quiver to the belt ring.  I chose to stitch these before finishing the quiver because I was afraid that I fat hands wouldn't be able to get to the back to pull the needle through once the quiver was assembled.


So far so good.  Onto the other half of the strap.  These stitches were done by piercing with a simple round awl.  I didn't mark the wholes first.  I just eye-balled the spacing and pierced through both pieces of leather at the same time.


I'm rather proud of how clean and neat the stitching is on this project.  The following is the back of the piece.


Same approach for the bottom strap.  This time I could not finish the entire stitching with a single run.  I had to re-thread the needle twice so you can see a small lump where I doubled up the stitching.  Turns out that you can really tell very much once I oiled it all up anyway.  I used the same approach for both straps.  I ran two needles opposed to stitch after piercing all the holes with a round awl.


Straps stitched.... side stitched.  I used a similar approach to stitching the side.  That is, I used opposing needles.  I believe it is called a saddle stitch in modern lingo, but I'm not sure what it would have been called in period.


Fully stitched and ready for the bottom to be added.


Bottom stitched on.  I debated over two approaches to capping the bottom.  I ended up doing what you see below.  The red line in the image shows the manner in which I pierced the leather with the awl.  I then used a saddle stitch to cap the end on.


Here is my daughter holding the quiver to give me an idea of what it will look like.  Not like I could change the project at this point anyway.  I like the look though...whew!


First round of oiling.  This image was about 20 minutes after the first coat of Neasfoot oil.  I wasn't sure how much it would take, but it soaked up like a sponge.  I let the first coat sit for about 24 hours before deciding that a single coat was clearly not enough.


Turns out the quiver was made of leather so dried out that after one day the quiver looked like I hadn't oiled it at all.  The following images were the following day after two more coats.  I coated the entire piece and then waited about an hour and did it again.


I waited 2 full days and it looked like I hadn't oiled it at all.  Ugh!

On to the final piece needed to complete this project. I needed some sort of hook to clip the item to my belt.  I don't know of any extant hip quivers in existence so I had to piece together some items and fashion my own idea.  Some will look at it and consider it a purely modern piece.  I hope not, but oh well.  I found the following images of some sword clips.  These were used to connect a man's sword to his belt so I thought why not use the same technology to connect my quiver to my belt.  Seems reasonable.  


I used a similar basic design to the hoop, but decided to hang the quiver right from the clip instead of adding a ring to the hook.

Here is the second version I made.  Yup the first one sucked.  I started by fish-tailing the end and then tried to fashion the ring.  That doesn't work.  This one I made the ring first, then cut the piece to length and then fish-tailed it.  Much easier that way.  No pics of the first "fail".


Here are all the pieces required for this belt clip.  The rod is the same rod of copper that I made the hook out of.  I planned to use it to make the rivets to hold the item together.  You will notice that the belt loop portion of the leather is much darker here than the rest of the quiver.  This time I oiled it up good before assembly.  This piece has about three coats of oil on it.


And here is the finished piece!  Yup, this version is much darker.  I spoke with a friend who does much more leather work than I do and she suggested that I use olive oil to moisturize the leather.  My leather was much too dried out.  Was sitting in my basement for about 6 months or so I think and it must have really dried out. This image was taken after three coats of olive oil.  I think I will wait a couple days and apply one more layer of oil before the A&S competition.  I am much happier with the color now.  This was the sort of color I was hoping for when I started construction.