One of the first tools I made was a small circle. I cut the tip of the tail off and then used that tip to aid in the creation of the rest of the tool.

I torched the flat end where I cut the tip off and used the tip to drive a small hole into the shaft.


This is what it looked like after two heatings. After it was completed I realized it was a bit bigger than I wanted so I made another smaller one. Never know when I might want this.

Here is the second version. You can see that I ground this shaft down a little before even heating.


I have a rather large vise that I mounted onto a tree stump. Very heavy to move around, but it makes a great portable vise in the shop.

To hold all the pieces while I worked on them I took a small piece of oak that I had lying around. This wood was scavenged from a pallet back when I used to work loading docks many years back. I have a good pile of it in the garage and use it for everything.

Here you can see the whole collection. I've tried some out already and I am really happy with the way they work. The length of the shaft was driven by the size of the nail. I started with the two on the right (in the picture above). That was a much larger nail. After making those two I realized I could use a smaller nail. This nail was cut in half to make two tools. The rest of the tools were cut to about the same length. I practiced some with them and I like the size.

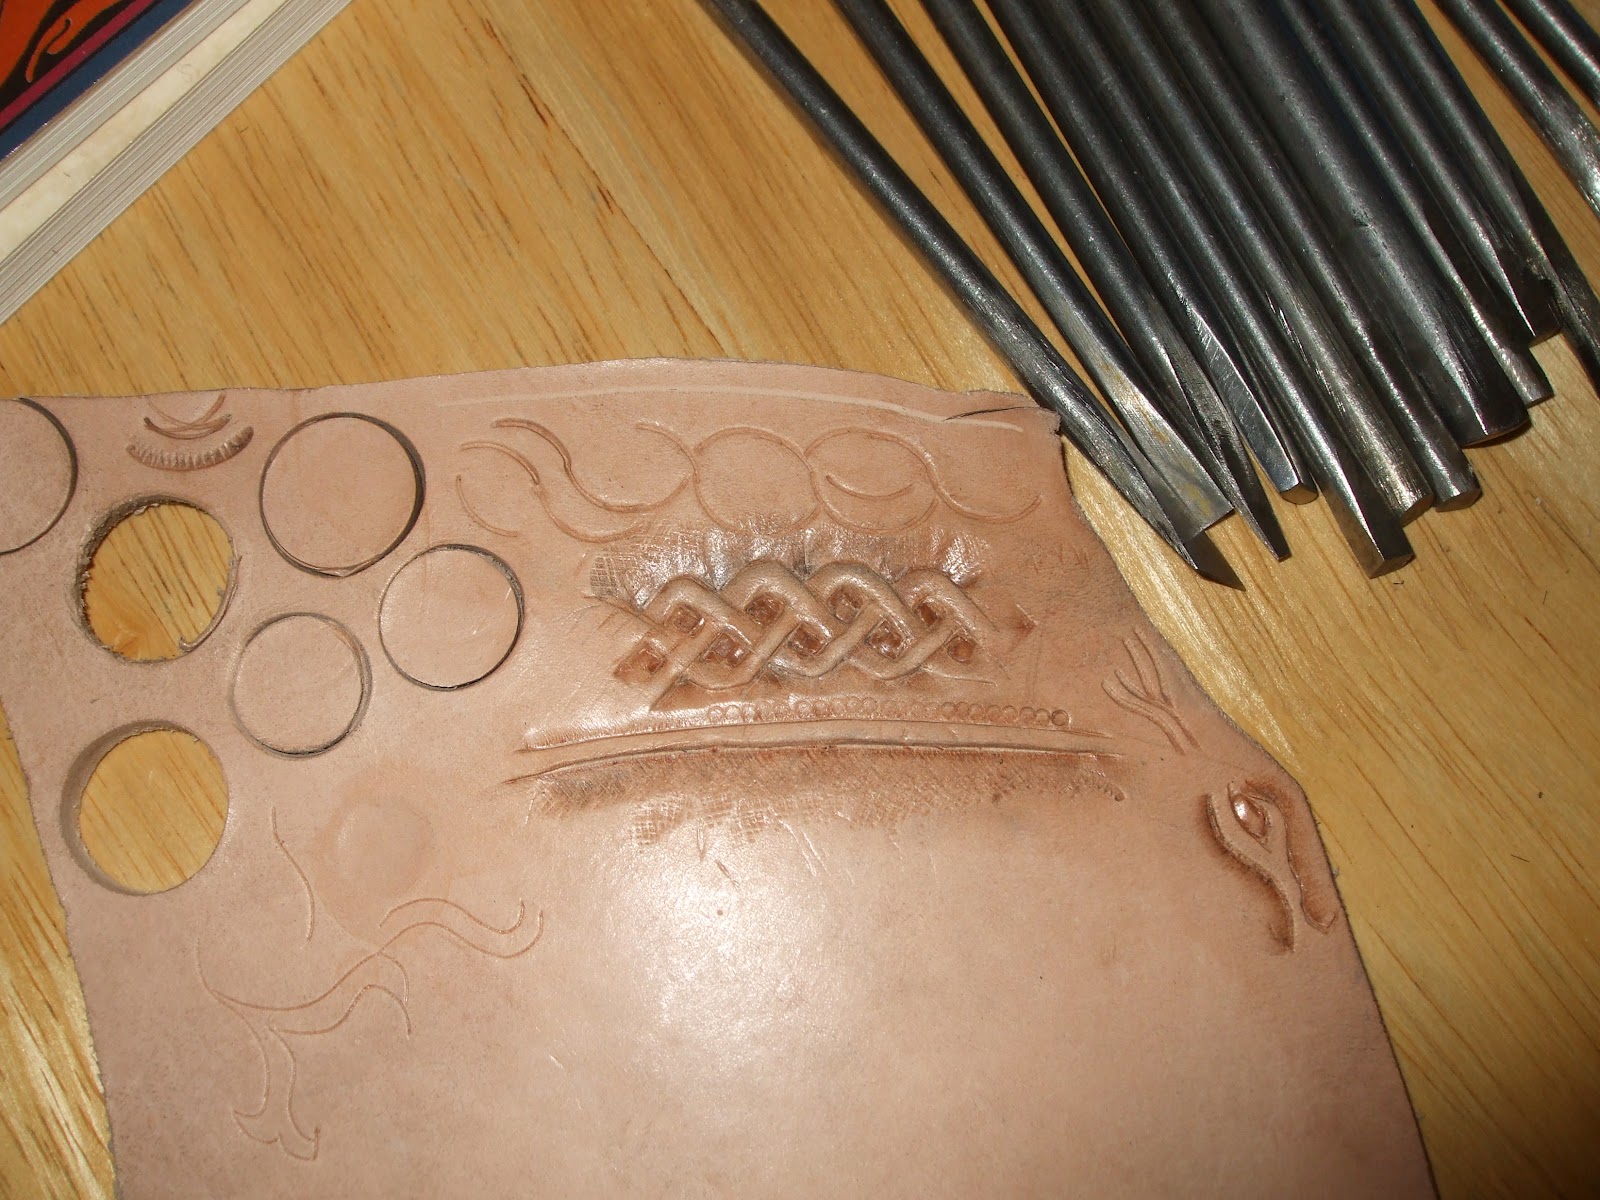
I watched a bunch of YouTube videos on tooling to get the idea of the types of shapes I'd need. the two on the right, below, are among my favorites. They are what I've heard called shaders. They have a very rough criss-cross pattern on them. When used repeatedly it makes a nice textured background. So far I didn't take any pictures of the way the leather looks when stamped, so you'll just have to weight. I made these by hammering to shape and then heated to bright orange and used a heavy kitchen knife to score the lines in it. I bought an entire set of kitchen knives in a nice wooden display from Salvation Army. I've used the longer knives around the yard for gardening. I like them a lot. Very heavy and very cheap. Perfect for this job.

The rest of these tools were a combination of things that I had seen on the videos and some things I fashioned in my mind. I have a design in my head and I tried to come up with all the types of tools I might need to fabricate that design.


Here is a small scrap of leather I was using to test the tools. I can't wait to start the "real" thing.