
Well, I have begun the creation of the pattern which I hope
to use to make my next outfit, the Landsknecht Peacock outfit! I found a pattern online, but decided not to
purchase it for a couple reasons. First,
I found that the pattern was a bit pricy and I couldn’t find anyone who I knew
who had used it and would recommend it.
Second, I found that it might be more rewarding to build an outfit from
a concept sketch with absolutely no aid of modern patterns or pattern
books. I’m strange that way I suppose. In a previous post I displayed my concept
sketches. They have not changed since
then. The next step was to build a
mockup of the sleeves and then disassemble the mockup to be used as a
template. I have chosen to use some
scrap fleece I had in the basement as a pseudo wool. The inside sleeve mockup will be made from
remnant of an old curtain and the poofy under sleeve will be mocked up using
some scrap cotton from an old table cloth used at a local SCA event.
I anticipate the sleeves being constructed of four
layers. The inner layer will be made of light
weight linen, the second layer will be used as a foundation to stabilize and
gather the next two layers. The third
layer will be made of a very large piece of silk which will be gathered to
provide the poofy appearance of the finished sleeve. The final layer will be the slashed panes of
wool.
To begin mocking up this image I had in my head I took a
string and made a loop in it. I used the
loop to gauge about how large I wanted to make the arm hole. I placed the loop at the top of my shoulder,
around my arm and connected under my arm pit.
Once I was satisfied with the size of the loop, I cut the string. I could then use that string to lay out the
top of the sleeve’s stabilizing layer. I
eyeballed the layout based on many modern shirts I have constructed. The top of the sleeve will look something
like the following:

I measured the length of my arm and added four inches for
good measure. I measured the circumference
of my wrist, added 1.5 inches and used that as the gauge for the bottom of the
sleeve. I eyeballed about where I wanted
the poofs to be gathered, based on the approximate spacing of my concept
sketch. I ended up with something in the
shape of the following:

I basted the sleeve together and tried the fit on. I made some small modifications in the fit
and then marked the cuff for the proper length and voilà, the sleeve foundation
was complete. You can see that I
sketched the spacing onto the foundation layer with a marker. I love this portion of the project. Allows for a lot of creativity and I can use
a MARKER instead of chalk or fabric pencil.

The next step was to disassemble the sleeve (which will
become a reoccurring theme) and use that as a template for the next layer which
will be the innermost layer. I plan on
making this layer only slightly larger than the foundation layer. I cut this from some cotton and set it aside for
the last fitting of the mockup.
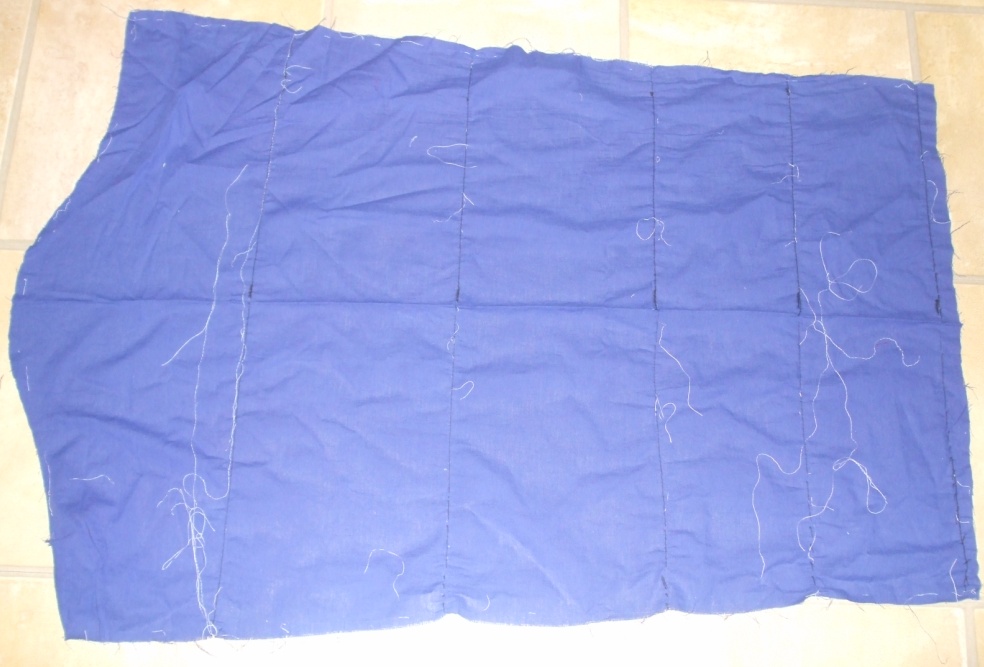
The next layer, is the third layer which I will call the
silk layer. In the final construction
this will be done in a vibrant blue silk or some other pretty peacock looking
shot silk. I need this layer to be
large. My first mockup of this layer
didn’t work out. That’s all that will be
said of it… The next and better version was
based on an estimate of material which is about 30% wider than the foundation
layer and almost 50% longer. I wanted
this layer to provide the substance of the poof behind all the slashed wool
panes. I again eyeballed the sections
where they would be gathered and marked them with a black marker. The resulting piece (I was hoping) would look
something like this:


Before I proceeded with the wool panes I wanted to be sure
that the amount of poof looked like I had envisioned it. This meant that I would have to run a basting
stitch along all the dotted lines and then gather them into the size of the
foundation layer and stitch them together.
Not my favorite portion of the project so far. I hate gathering. The result was almost what I had hoped
for. In the following image you can see
the mockup of the foundation layer and the silk layer assembled. I think that the next version of the mockup
would perhaps have a small amount of padding in each section for just a little
more poof. There is enough material in
the silk layer, just not enough body to produce the poof I wanted.


Next step, yup, disassemble again. As much as I hate basting and gathering, pulling all those stitches out is even worse. Yuck. I now have the basic patter for the first three layers and have moved on to the last, best and prettiest of the layers… the wool. I have envisioned the panes to be about 1~1.5 inches in width. I wasn’t sure about wether or not I would have to gather them at all and so I did a handful of “proof of concept” tests to see which size I liked. The result, so far, is about 1.5 inches in width, only about a .25~.5 inch gather at each dotted line and about .25 inch overlap when it comes down to the wrist. I toyed with the idea of making the panes progressively smaller at the wrist and I didn’t like the way it looked. The panes will be virtually parallel. Here is the layout I envision as it relates to the foundation layer.

I have since sliced up my panes of fleece and they now sit
in a pile waiting to be assembled. I
anticipate tacking the panes together and doing the small gathering so that the
result will look something like the following:

At that point I intend to attach the top three layers
together and test for fit. More later
when that happens.