Pages

Showing posts with label Sleeves. Show all posts

Friday, June 22, 2012

Landsknecht sleeves almost done

Not much in the way of a write up on today's post.  Only a couple pictures.  I have finished the construction of the second sleeve for the Landsknecht outfit.  Still have a little more finish work to do on the braid accent and the sleeves have to be lined.  That couldn't stop me from wanting to pin the sleeves to my T-Shirt to see what they will look like.


That's it!  It's 1:30 and almost time for bed.  Will have to finish the trim later. :-(

Monday, May 28, 2012

Well, not all designs end up in the finished product.  I wasn't exactly sure what I wanted to trim the sleeves.  I wanted some sort of blue stripe across the panes where they were gathered, but I wasn't sure exactly how I wanted to construct the trim.  I tried the following four ideas which looked a lot better in my head than then did on the sleeve.  I took the pictures for posterity and then quickly tossed them into the trash.


Here is the final design that I ended up going with.  I used a heavy weight cotton thread to tack down a strip of blue wool (that I got from another coat).  The blue coat matched pretty close to the shade of blue of the silk that I had as the sleeve backing.  

Took some time, but I think it was worth it.  I really like the patter and the color as an accent.  Adds a little bit of design without too much over embellishment.

Here is the final sleeve stitched closed for the last time.  I know, it ain't pretty.  Frankly, I'm not sure why I took this picture other than because it was one step in the process and In knew once I turned it right side out, it would never look like this again.

I still have some finishing touches to to on the blue trim to close it at the seam, but for now the sleeve is wearable.  You can see that the sleeve is slightly more puffy than the last mock-up.  I stuffed each section with a strip of a cotton shower curtain.  I got the curtain from a garage sale free-bee.  Was a loose decorative cotton mesh with a little embroidery on the edges.  I cut it into strips and fed a strip inside each of the five sections of the sleeves.


Now, it is ready to wear.  I'm really happy with this, even though it has taken three times longer than I thought it would.  So far the hand sewing notion seems to be still doable.


Sunday, May 20, 2012

Landsknecht sleeve panes assembled

After all the slashes have been completely jointed and cut to length I was ready to assemble.  This is the final layout of the pieces ready for connection and attachment to the sleeve.

Here is the layout compared to the silk sleeve.  You can see that the strips are about 45 inches and the sleeve is about 24 inches long.

I ran a single silk thread through the center of each strip of wool that I could then use the gather the panes together.  The wool is rather thick and you can see in the image below I was able to pierce the center of the strip very nicely.


After all the pains were joined together I tightened the basting thread to gather the panes to the correct width that was required to fit the sleeve it would be tacked to.  I then placed the panes onto the sleeve and pined each pane down in the proper place to check the layout.  I found that I was not able to gather the wrist as much as I liked and therefore simply overlapped the purple and teal panes on top of the black.  It was sort of difficult to gather 24 inches of panes into about 9 inches around the wrist area.

Here are all the panes pinned and ready to stitch.

And... I'm done!  Took a ton of time, but I'm really happy with the look so far.  I am still pretty sure that I will stuff the sleeve a little bit.  I have some cotton mesh which was sold as a shower curtain lining.  It is rather stiff and will hold up some body and at least it isn't plastic or polyester.

My next step will to be to create some blue and/or purple straps to cover up and accent the section where the panes are bound to the sleeve.  Not sure exactly what or how I will do it yet.  I have a design in my head, and I have some blue and purple leather and blue wool coat I bought.  I have to play with some designs before I continue on the real sleeve though.  I can't wait to see one sleeve done and the design final.  At least at that point I can start plugging away at the second sleeve without thinking much about the design and simply focus on the process.

Lots of slashing getting ready

The layout process has begun for the final assembly.  I used a pattern board.  I don't know the technical name for it, but it is simply a large piece of cardboard with a grid drawn on it.  It is used for laying out patterns.  I picked this one up for $2.50 at Salvation Army.  I used some blue painters tape to mark off the lengths of each section.  Since I had obtained my wool from various coats, the size of wool strips I had was varied.  I knew that I would have to splice some sections together to make the final strips and wanted any seams I made to fall on the section of the gather so as to best hide the seam.

Here is the piles of strips waiting to be collected, measured and joined.

I started by laying out all the pieces which would make up each sleeve.  I chose the pieces which would best get the most out of each piece of wool with the least amounts of seams which would show.  This is the final layout and the splicing can begin.


I spliced all the sections together by whip stitching the ends together.  I did all the splicing using silk thread as close as possible to the color of the wool.


After flattening out the butted ends you can see that when the seam is tightened the wool tended to splay at each end.  I simply used a straight edge over the seam and trimmed the edge nice and straight again.


Finished seam ready for assembly.  This shows up quite easily in this photo, but when the final garment is viewed the seam is virtually invisible as I aligned each splice to fall right on the area of the sleeve which would be covered up by further embellishment.


Wednesday, May 16, 2012

Landsknecht sleeves coming along


After completing the mockup, I tweaked the pattern a bit.  I looked at my photo of the sleeve mockup side by side with the concept sketch I made.  I decided to alter the panes by making them about 50% thinner.  That means a lot more cutting and layout work, but it will also make it easier to use up more of the coat.  When you chop a wool coat up there are a lot of seams, pocket holes, button holes etc.  Those holes and seams which get in the way when laying out a patter.  With the thinner panes I will likely get more use out of the wool provided from the coats.  I chose to alter the size of the segments of the sleeve as well.  Previously with the mockup I was not happy with the smallest segment by the wrist.  I spaced them out differently.  The sleeve outside length is 27 inches.  The segments are 4”, 5”, 5”, 5” and 7”.  I also think that I will put a small amount of padding in each of the upper sections to produce a little more volume.  The silk looks nice now, as it is, but doesn’t have the body I was hoping to produce the look I intended after the wool strips are applied.
Here you can see a side by side of the most recent mockup, the original sketch and the final hand stitched silk sleeve.


I have chopped up enough teal and purple for the sleeves.  Ran out of energy cutting up the black and will have to continue another day.  So far the progress is slow going, but looking good.  The strips are only one inch wide and any variation off the straight line is very visible.  It seems to take more focus than I would have expected to simply cut a bunch of straight lines.


Saturday, April 28, 2012

Landsknecht sleeve mock-up a success

I have finished the mockup of the sleeve and I'm rather happy with the outcome.  There are a few things I think I will tweek for the final pattern, but I don't think I need to revise the mockup and rebuild it yet again to see how it will look.


Thursday, April 26, 2012

Landsknecht sleeves, day 2


I started assembling the panes for the mockup of the sleeves.  Turned out that I had some purple and green fleece in the basement from a past project for my kids.  I wasn’t sure how I would manage the assembly.  At first I ran a hand stitched seam holding the panes together at the gather point.  I found that to be much too tedious.  For the remaining seams I chose to use some painters tape to hold the pieces together.  I laid all the pieces out on the floor and then placed a strip of masking tape along the seam line.  I rather like that approach.  It held well enough while I used a sewing machine to run the stitch and hold the panes together.


The blue masking tape was easily removed without damage to the material as well.  I will test this on the wool before I do the final version, but I don’t see any reason why it would work differently for the wool.  I’m still considering hand sewing this doublet.  Until I decide for sure I think I’ll keep this tape approach in my back pocket.

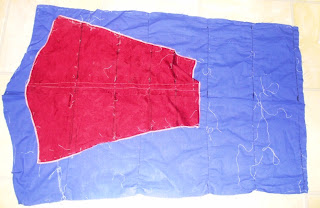
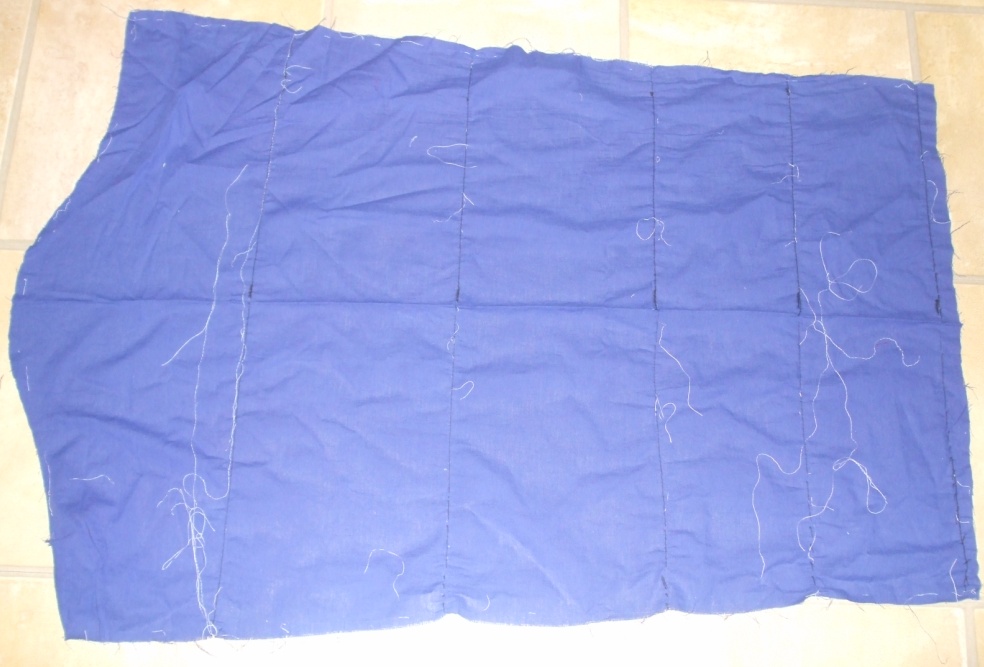
You can see the stitched panes with and without the foundation layer of the sleeve lying upon it.


Wednesday, April 25, 2012

Landknecht Sleeve mockup begun


Well, I have begun the creation of the pattern which I hope to use to make my next outfit, the Landsknecht Peacock outfit!  I found a pattern online, but decided not to purchase it for a couple reasons.  First, I found that the pattern was a bit pricy and I couldn’t find anyone who I knew who had used it and would recommend it.  Second, I found that it might be more rewarding to build an outfit from a concept sketch with absolutely no aid of modern patterns or pattern books.  I’m strange that way I suppose.  In a previous post I displayed my concept sketches.  They have not changed since then.  The next step was to build a mockup of the sleeves and then disassemble the mockup to be used as a template.  I have chosen to use some scrap fleece I had in the basement as a pseudo wool.  The inside sleeve mockup will be made from remnant of an old curtain and the poofy under sleeve will be mocked up using some scrap cotton from an old table cloth used at a local SCA event.
I anticipate the sleeves being constructed of four layers.  The inner layer will be made of light weight linen, the second layer will be used as a foundation to stabilize and gather the next two layers.  The third layer will be made of a very large piece of silk which will be gathered to provide the poofy appearance of the finished sleeve.  The final layer will be the slashed panes of wool.
To begin mocking up this image I had in my head I took a string and made a loop in it.  I used the loop to gauge about how large I wanted to make the arm hole.  I placed the loop at the top of my shoulder, around my arm and connected under my arm pit.  Once I was satisfied with the size of the loop, I cut the string.  I could then use that string to lay out the top of the sleeve’s stabilizing layer.  I eyeballed the layout based on many modern shirts I have constructed.  The top of the sleeve will look something like the following:
I measured the length of my arm and added four inches for good measure.   I measured the circumference of my wrist, added 1.5 inches and used that as the gauge for the bottom of the sleeve.  I eyeballed about where I wanted the poofs to be gathered, based on the approximate spacing of my concept sketch.  I ended up with something in the shape of the following:

I basted the sleeve together and tried the fit on.  I made some small modifications in the fit and then marked the cuff for the proper length and voilĂ , the sleeve foundation was complete.  You can see that I sketched the spacing onto the foundation layer with a marker.  I love this portion of the project.  Allows for a lot of creativity and I can use a MARKER instead of chalk or fabric pencil.

The next step was to disassemble the sleeve (which will become a reoccurring theme) and use that as a template for the next layer which will be the innermost layer.  I plan on making this layer only slightly larger than the foundation layer.  I cut this from some cotton and set it aside for the last fitting of the mockup.

The next layer, is the third layer which I will call the silk layer.  In the final construction this will be done in a vibrant blue silk or some other pretty peacock looking shot silk.  I need this layer to be large.  My first mockup of this layer didn’t work out.  That’s all that will be said of it…  The next and better version was based on an estimate of material which is about 30% wider than the foundation layer and almost 50% longer.  I wanted this layer to provide the substance of the poof behind all the slashed wool panes.  I again eyeballed the sections where they would be gathered and marked them with a black marker.  The resulting piece (I was hoping) would look something like this:


Before I proceeded with the wool panes I wanted to be sure that the amount of poof looked like I had envisioned it.  This meant that I would have to run a basting stitch along all the dotted lines and then gather them into the size of the foundation layer and stitch them together.  Not my favorite portion of the project so far.  I hate gathering.  The result was almost what I had hoped for.  In the following image you can see the mockup of the foundation layer and the silk layer assembled.  I think that the next version of the mockup would perhaps have a small amount of padding in each section for just a little more poof.  There is enough material in the silk layer, just not enough body to produce the poof I wanted. 


Next step, yup, disassemble again.  As much as I hate basting and gathering, pulling all those stitches out is even worse.  Yuck.  I now have the basic patter for the first three layers and have moved on to the last, best and prettiest of the layers… the wool.  I have envisioned the panes to be about 1~1.5 inches in width.  I wasn’t sure about wether or not I would have to gather them at all and so I did a handful of “proof of concept” tests to see which size I liked.  The result, so far, is about 1.5 inches in width, only about a .25~.5 inch gather at each dotted line and about .25 inch overlap when it comes down to the wrist.  I toyed with the idea of making the panes progressively smaller at the wrist and I didn’t like the way it looked.  The panes will be virtually parallel.  Here is the layout I envision as it relates to the foundation layer.

I have since sliced up my panes of fleece and they now sit in a pile waiting to be assembled.  I anticipate tacking the panes together and doing the small gathering so that the result will look something like the following:

At that point I intend to attach the top three layers together and test for fit.  More later when that happens.