
The book is basically bound at this point except for the inside cover sheet to cover the binding. I wanted to make the clasp for the book next so that the rivets used to mount the hardware would be covered by that cover page. I know that most books had hardware made from bronze or brass. For this book I didn't really care about that. I chose to use pure copper as I really love the look of copper. I also like the way the copper metal matched the look of the color or the leather.
The copper used for the clasp was reclaimed from a copper plate found at Salvation Army. I used sheet metal shears to cut the basic shape below. I chose to cut straight triangular lines and then hammer the curled decorative edges. I figured it would be easier to hammer the curl than to cut it out.

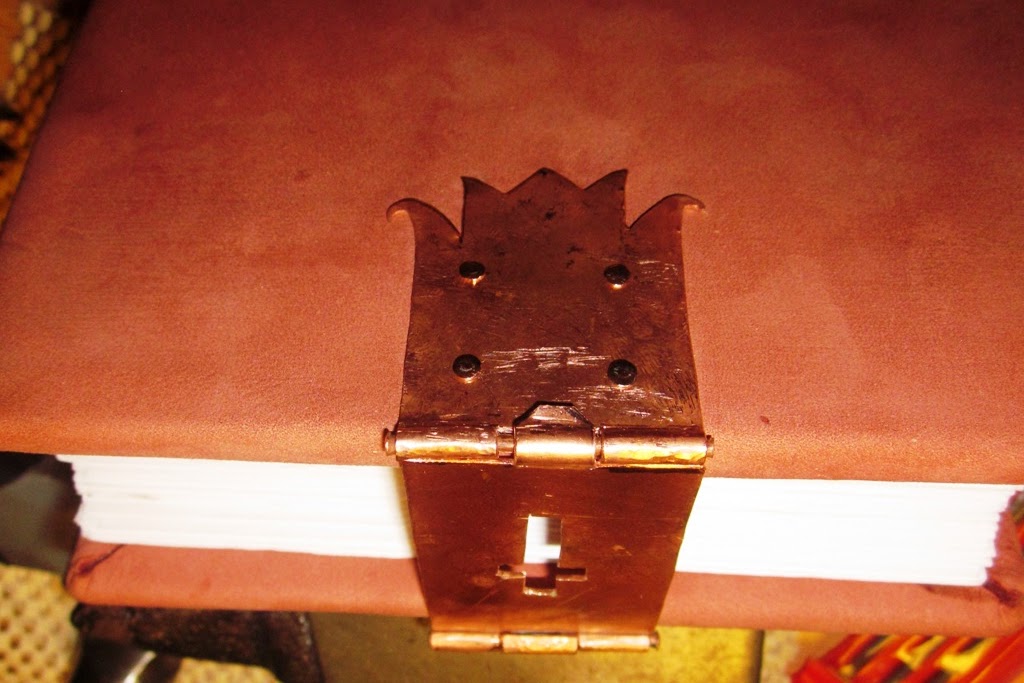
This copper work was done at a friends outs. I forgot to bring my camera so I have only a few pictures taken of this process with my phone. The below images were the beginning of a simple bit of embellishment I chose to add. As this would be a traveling book carried by a friar I didn't want the book to be too fancy, but I also wanted to add a little "something" to it. I chose to cut out a silhouette of a cross on the clasp. I used a small cold chisel for this portion. I simply struck the piece until it was cut about 90% of the way through an then pushed the cutout through.

Once the opening was cut the remaining portions of the cross were easy to cut. Using a cold chisel I only had to cut about 1/2 way through. Two light blows were enough to make each mark. I then used a small pair of pliers to pull the piece out.


I was a little surprised how easy the cutout portion was. That cross took only about 5 minutes to free-hand sketch and cut out to this point.

I took some small metal pin files to the opening to clean up the cut and make it as straight as could be.

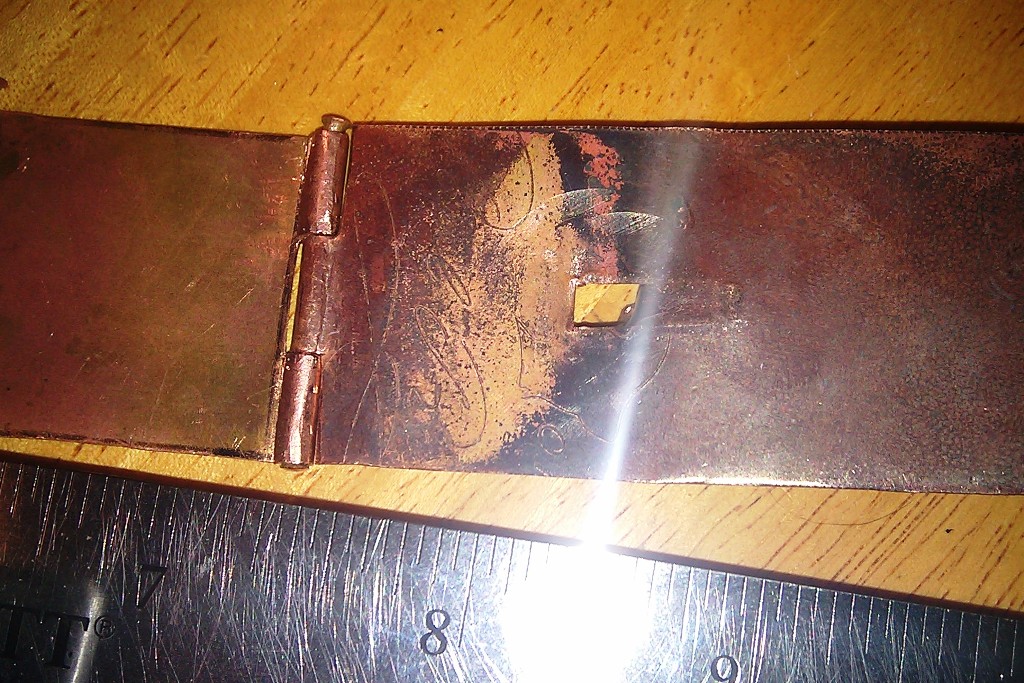
At this point it is very noticeable that I chose a piece of recycled copper from Salvation Army. Apparently the bottom of the plate had some engraving on it. Oops. I didn't notice that when I had cut it out. There is some mild discoloration in the copper. That was caused by the heating. The plate seamed to have a thin coat of varnish to protect it from tarnishing. I simply heated it up and quenched it. All the residue of the coating came off. That also helped soften the metal which allowed me to fashion the curly sections at the top.

Basic fabrication done on the hinge. The pin I used for the hinge was a small piece of copper electrical wire. I simply peened over the ends of the wire when the hinge was done. After basic shaping was done I placed the pieces in some Tarnex for about 10 minutes and they looked great!

Now this is the portion of the project that had me most worried. I knew how a hinge worked. I was pretty sure I could make one. The part I didn't know for sure was the hook end. I fashioned the receiving piece just like the first part of the hinge only I didn't permanently attach it to the other piece of copper.

Pin portion looks a little wonky. I kept bending the pin while trying to peen over the ends. Next time I'll work harden the wire much more before I add it to the hinge. I planned on fixing that later. Needed a good stopping point.

So far so good. Break time.


Well rested and ready to attack again I started the next part of the project by marking four spots for the rivets. I simply eye-balled these marks and then used a nail-set to mark the spot where I would drill the holes.

Before drilling the holes I wanted to ensure I had a nail/rivet that would work. I purchased some 3/4 inch copper nails. I liked the overall size of these nails, but they were too flat on the surface.


I simply used a ball-peen hammer to peen the head of the nail. This made the nail look more like the period rivets I had seen in images.

Drilled the metal now that I knew for sure the size of the nail/rivets I would use.

I drilled the holes in the metal and then marked the corresponding holes on the book. I drilled the snuggly fitting holes through the leather and the wood cover. I then insert the nails and bent them over snuggly. This is the portion of the assembly that I intend to hide with a glued on cover page.

Surface view of the cover hinge.

Same techniques again for the back cover. Back cover is a little uglier. Live and learn. This was towards the end of a very long evening of work. I finished this portion about 4:00am.

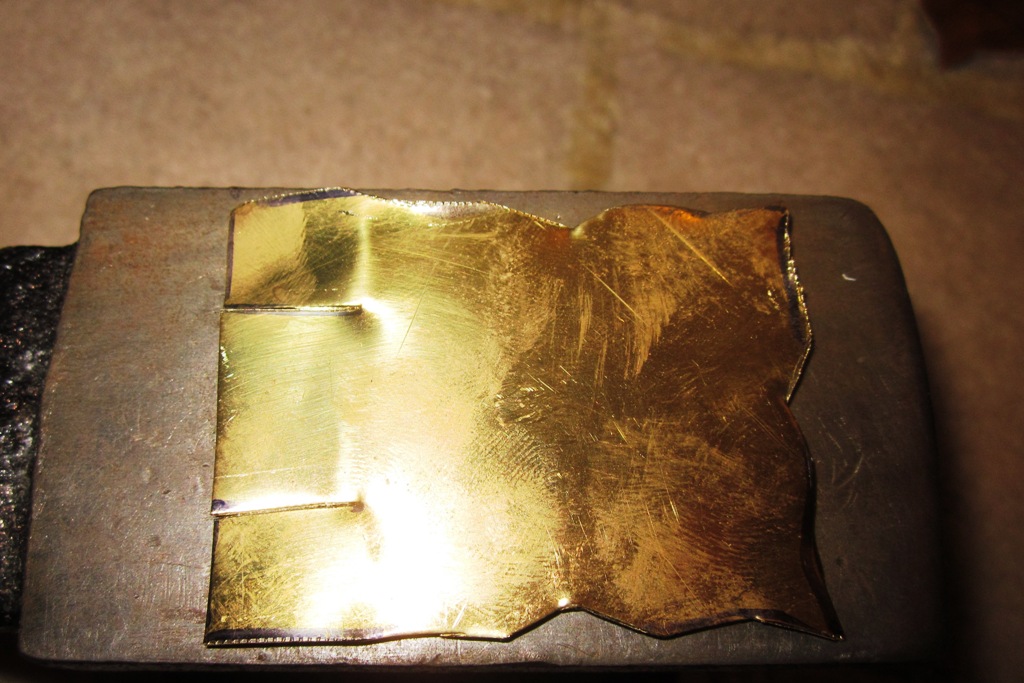
Now the problematic portion. I had initially cut the flap portion of the clasp long so that once it was attached I would be able to measure the exact length I would need to cut it to.

I really should measure this and mock-up a piece, but nope. I just sketched the line with a marker, eye-balled it and then cut it.

After cutting off all of the portion of the above piece that was colored black I rounded the lip with a file and then used some small scrolling pliers to shape the hook.
I used a hammer and flat jaw pliers to get a snug-but-not-too-snug fit. Works great!

Time to start work on the second book. Here is the glued up book with no finish. I chose to finish this one with a light coat of oil.

Yuck. Oil made it look kind of odd at first.

Other side of the book had some small blemishes in the surface of the leather. Luckily after two days of soaking in, the color all evened out and the blemishes sufficiently absorbed the oil and colored out evenly.

This book was a bit taller so I opted to go with two clasps on this one. I'm trying a different design and this time around I'm using brass. I did a rough sketch on a piece of paper and used that as a template. I traced it with marker on to the scraps of brass (from another Salvation Army plate).

I did a bit of light hammering to get the piece as flat as I could without damaging the surface. I then used a cold chisel to make the cut across the bottom of the hinge.
Brass cuts nicely with a cold chisel. One hit, move the chisel and one more hit. I then simply pressed on the cut piece and it popped out.

Here are the cut pieces. Some are blackened slightly from burns. this plate had some stickers on it from the previous owner and from Salvation Army. I chose to burn them off and then soak in Tarnex later. I didn't want to damage the surface trying to scratch them off.

Every little bit of brass or copper I chop off goes into the bits bin. Saving for a later melt-down into another project.

At this point these pieces were cut out using only chisels and tin-snips. The curvy lines were tough to do though so most are not even.

I stacked all four pieces up and then uses some metal files to file across the edges to ensure that all four pieces would be as close to the same size as possible.

Cleaned up the edges, soaked in Tarnex and ready to mount the pins.

This time around I chose to do a mock-up. I wasn't sure exactly how long a tongue to leave to make it around the pin. I made the following mock-up to ensure I had the look I wanted.

Test look.

Here are all four cut pieces on the book. You can see that the color of the leather has evened out nicely and has a nice rich tone.

I had to cut the tongue down about 1/8th inch to make it fit.

For each of the pieces I used my small anvil to create a sharp crease by striking it while it overhung the edge.

I then took the bent piece and used pliers and light hammering to work it into shape around the pins. I will swap out these pins later. These are only loosley held in place. I need to do some clean up, drilling and then polishing and then I'll put the real pins in.

Overall I'm happy with the progress, but unhappy with the time commitment.
Doing two books at the same time helps learn but overall the work on the books represented only on this blog post was probably about 10~12 hours or so.