Pages

Thursday, May 28, 2015

Wood Working Tools

Shave Horse

I had anticipated that one of my Pentathlon entries for the A&S faire would include a demonstration of woodworking techniques one of which would use my shave horse.  Well I finally finished the horse but it will need repairs this summer.  I had cut the wood to be used last year.  The pole I had intended to use to hold the head of the shave horse checked very bad as you see here.


With little access to a replacement I had to proceed with the flawed wood.  I shall replace it as soon as I can harvest a replacement chunk of wood.  I cut the ends to shape and drilled some holes and was able to complete the horse which works great.


Here you can see the finished horse.  It met my expectations in a couple ways.  1) Big and chunky 2) portable & 3) rustic looking.  

I wanted something big enough to be functional and durable and yet comfortable for a man of my girth.  My first version was a bit to small and I never really felt comfortable working on it.  This bench has some real girth to it and is very sturdy.  It is also very easy to set up and tear down for events.  It is as big as I could make it and yet still fit easily in the back of my car.  Lastly it is clear that it was cut and made from a tree rather than purchased lumber.  I love the "rustic" hand made look. 


Levels

One of my entries into the Pentathlon was going to be a collection of tools. I wanted to create a collection of tools that I could bring with me to demos to show off.  Some of these I may never use.  That's fine.  They will serve the purpose even if only as a prop on my set.

I created three levels which serve slightly different purposes.  All three were created using power tools.  In this case I was more interested in a period looking tool rather than the period construction technique.  

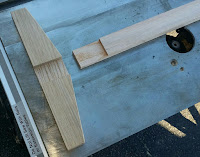
I cut the pieces out with a table saw and cut lap joints on the 45/45/90 triangle.  Once cut and fitted I glued and pegged the pieces together using 1/4 inch oak dowels.


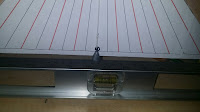
The first of the three levels would not only measure straight level but would also have gradations on it.  To do that I taped a piece of paper which had markings in 10 degree increments on it.  I then used a sharp knife to cut along the lines in the paper to score the location on the level.


I then hammered a thin bras wire almost flat and drove it into the cuts.  I had never done anything like this before so I feared the outcome.  As it turns out doing brass inlay is very easy and works equally well along the grain as it does across the grain.  I used a small jeweler's hammer to drive the wire into place and then snipped the ends off.


Here you can see a small amount of wire sticking out.  I used a small pin file to file the brass down even with the wood.  Once filed down you cannot even feel where the line is.


 To be a proper level it would require a free hanging string and a weight.  I carved a small mold from soap stone and poured a few pewter weights.  I then clipped the sprue off and cleaned off the piece with an small knife.
 

 Once the weight was cleaned up and tied to a piece of linen string I mounted it to a brass nail on the level.  I placed the level on a modern level to ensure that the tool was calibrated correctly and it works great.


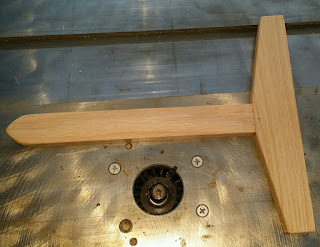
I followed the same basic construction techniques to make two more levels of a different variety.  I used oak for the preceding level and the T shaped level below.  The straight vertical level was made of maple.


I dampened the wood with a wet sponge to raise the grain of the wood.  I then scraped the wood smooth before inserting the brass inlay.


Once completed I coated the level with a bit of olive oil which brought out the color

The last level was the easiest to make as there was no real assembly needed.  I cut the basic shape out and then used scissors to free hand a basic shape for the cut out section at the bottom.
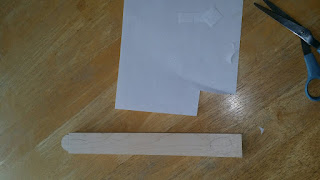

I used a scroll saw to cut out the hollow section and then cleaned up all the edges with files and scrapers.  I again used a brass inlay to mark the center line.


I used another brass nail to hold the linen string and pewter weight.  Checking the calibration with a modern level I was not surprised to see that it did in fact show level.


Marking Guage or Skantyllion 

This tool was made from oak found in a firewood pile. The marking blade was made from an old hack saw blade. The basic shape and size of the tool was inspired by the tool found on the Mary Rose.


After cutting out the three basic shapes I carved the ends of the slide to be a bit more decorative than the Mary Rose version.


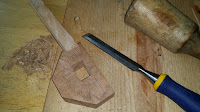
 I used a chisel to cut the hole which would snuggly fit the long portion of the tool.  This is the part of the process I found to be the most difficult.  The opening had to be snug, but not too snug.  It would have to hold in place when the slide was locked but yet move freely enough when unlocked.  This portion took quite a bit of time with small files tuning and adjusting the fit.


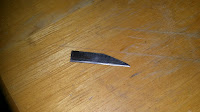
Once properly fit I proceeded to make the marking blade from an old hack saw blade.  I cut and sharpened the blade before cutting it off to size.


Cut to shape and ready to insert.


I then cut the locking mechanism used to hold the blade in place.  I'm not entirely happy with this portion as the blade doesn't cut as well as I would like.  I will likely replace the blade as some future date with one that is a little wider and fits a little more snug.


I dismantled the tool and applied a light coat of oil and let sit.


All oiled up and ready for use.


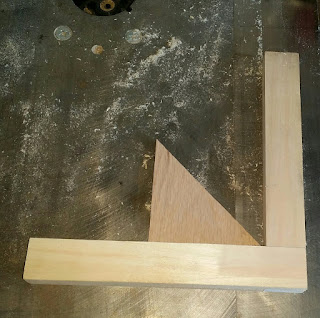
The last and easiest tool to make was a centering jig.  It is simply a 90 degree angle L with a 45 degree triangle mounted on it.  When a round piece is placed at the base of the L the 45 degree line always marks the center.  I can now use that to mark center, then rotate the piece and mark center again.  Wherever the lines cross is the center of the round stock.  I intend to use this with my newly constructed pole lathe.


A Bit of Blacksmithing - Inside/Outside Calipers (Dividers)

Here is the coal forge I was working on for this project.  An 1890's style rivet forge.  I started the fire with a bit of wood chips and ran the forge with coal.


Today's project would include 2 tools which are very much the same in their construction.  Inside and outside calipers.  Calipers are a device used to measure the distance between two opposite sides of an object. The inside calipers (number 1 below) measure the inside of a closed space such as the inside diameter of a pipe.  Outside calipers (number 2 below) can be used to measure the diameter of the outside of the pipe.


Inside Calipers

I started by making the inside calipers with some scrap metal from the shop.  I began like I begin many projects by sketching my idea on the face of the anvil with soapstone.  Eventually I will be placing hot metal on the surface of the anvil but the sketch will last long enough for me to make both halves the same size and shape.  I started with rectangular stock about 1/8th by 1/4 inch thick.  Rather than working two separate pieces I simply drew out and shaped each end of the metal matching them to the sketch on the anvil.  Once they appeared balanced and even I cut the stock in half.


After cutting to length I punched a hole in the ends of each piece and test fitted them using a small nail.  I had to do a small bit of filing to remove some small burs and then I used the cut nail to permanently rivet the calipers together.


Outside Calipers

The process of creating the outside calipers was basically the same except that stock I started with was round.  I found this old S-hook left from a previous class at the shop.  I started by straightening it out for my purposes.


I again sketched my idea on the face of the anvil and went to work shaping 2 pieces to match the sketch.


 Once nearly done I made sure that both pieces were as much alike as I could manage and then proceeded to punch the hold for the rivet.


So far so good.  I again used a small nail to do the test fit.


Once satisfied with the fit I cut the nail off and made a small leather washer which I oiled and placed between the pieces.
  

Once riveted up I did a small amount of file work on the tips to ensure proper alignment.  I peened the rivet over just enough to be snug when in use but not too tight as to stick too much.


A Bit of Blacksmithing - Flat Jaw Pliers


I once did a pin making demo and somebody made a comment about the fact that I was using a modern set of pliers.  I had removed the plastic on the handles to make them look as period as possible but some people ...

Anyway, since then this project has been on my list.  I wanted to create a period pair of needle nosed pliers.  I was also looking for a bit of practice doing the hinge which can also be used on tongs and other such tools.  I was well into the process and forgot to take step by step photos until nearly the end.

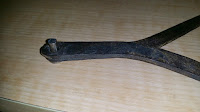
I started by placing my hand on the anvil and tracing the shape of my hand.  You'll see in the finished pliers that they are not symmetrical.  As it turns out they fit my hand perfectly and I believe if they were perfectly symmetrical they would not be as comfortable in the palm of my hand.  Once shaped and fitted I did a small bit of filing to ensure the joint was a good fit.  I then used a small nut and bolt to do the test fitting.


I placed the jaws of the pliers in the vice while still a bit warm so that I could tweak the alignment of the handle.


I quenched the pliers and tested the feel in my hand.  Once satisfied I removed the nut and bolt and used a nail to fashion a rivet which I peened over cold to complete the pliers.


I was so happy with the production that I immediately started making a pair of scroll pliers as well using all the same principles except that the tip of the pliers were rounded instead of flat jaws.


I was happy enough to finish the two halves of the pliers but ran out of energy and daylight before I completed them.  I'll come back to them some other time.


Cheap Leather Lacing

Been a long while since I've posted.  I was truly focused on trying to get a ton of entries done for the A&S Pentathlon.  I am now playing catch up with my hundreds of photos I've taken.

Here is a quick and easy idea.  If you love to thrift store shop as much as I do you have no doubt seen a ton of these types of belts on the rack.


You may see a belt, but what I see is a good source of cheap leather laces.  You can easily examine the belt for dry rot.  If the leather is in decent condition and is real leather I'd grab it.  There are a lot of 70's style belts made of fake leather so watch out.  I got this belt for one dollar at Goodwill.

I dismantle the belt.  I have a plastic bag filled with buckles and belt ends for future use.  I do all sorts of costuming so I generally keep everything just in case.


After a brief soak in warm water I stretched the leather laces around a baseball bat.  Any round object will do.  I left the leather on the bat for a day to fully dry and straighten out all the kinks it had from the braiding.


End result is very usable and very cheap leather laces.  This was a very wide belt and very long.  It produced over a dozen yards of leather laces.

Thursday, September 11, 2014

A Bit of Blacksmithing

I've really been spending quite a bit of time towards of the end of this summer playing with metal.  I have attended my first event with my blacksmithing setup.  While I REALLY enjoy doing metal work it can be a rather large pain in the butt moving all the heavy stuff around.  I unloaded everything back to the garage for a week and then decided to attend a couple more events with the my metal working stuff.  I had two more events one week apart so I simply left all my stuff in the car for the week.  After the last event I'm not sure I'll load it all up again any time soon to take to an event.

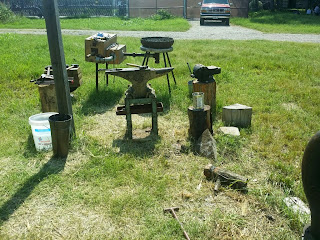
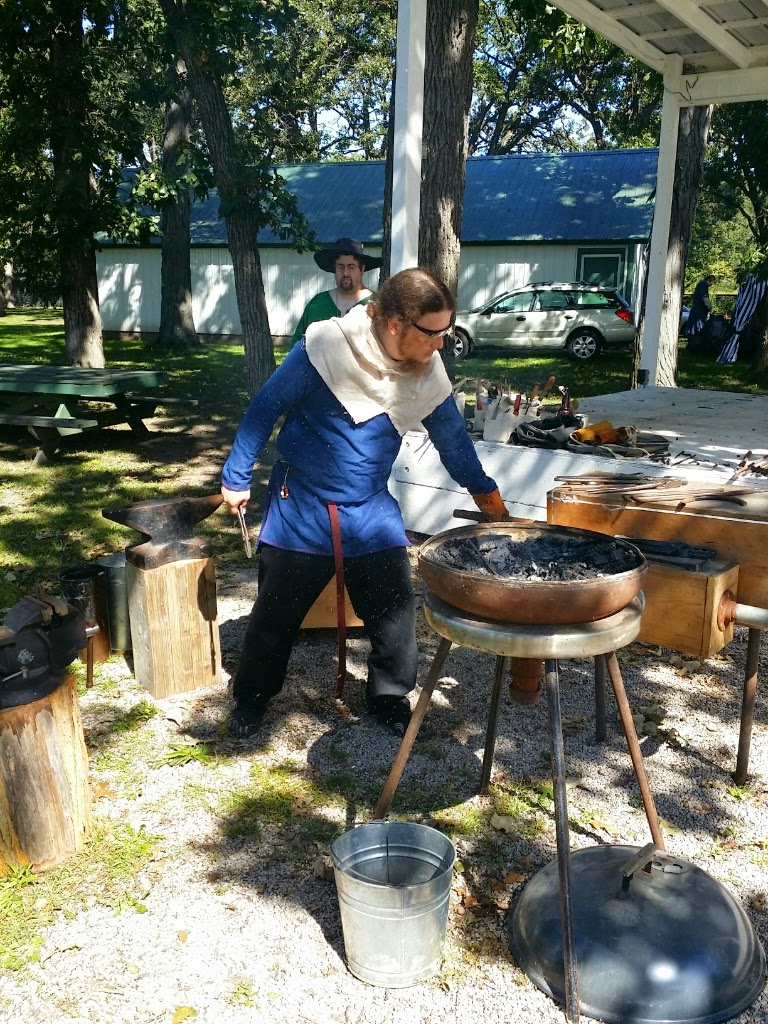
Here are a few pics of my basic setup.

I use a coal forge with a large Japanese style double action box bellow.  The bellows produces a good volume of air on both the push and the pull.  I purchased the setup from an SCA gentleman who was moving and didn't want to make the move with all his heavy stuff.  The large anvil you see in the foreground belongs to the site where I was working that day.


I typically use hardwood charcoal to start the fire and then switch to coal for the majority of the work.  I lined my forge with a portland mix and then coated it with a layer of refractory cement.  It makes for a rather heavy forge but it works great.  One small modification I plan on doing is to cut a gap in the lip of the forge to allow for longer pieces to lay flat across the fire.  I find that heating a long piece requires a wasteful stack of coal to get the heat up.  If i lower the edge I should be able to get even a flat piece down closer to the hottest section of the fire.


Here is the setup at the second event I attended.
My basic setup includes the following:

  • Forge 
  • Bellows
  • Large vise mounted to a chunk of very heavy osage
  • Anvil
  • Anvil stand made from 2X10 planks sandwiched and screwed together
  • Wooden box for storage and using as a table for my tongs and hammers
  • Small collection of hammers
  • Small collection of tongs
  • Coal bucket
  • Water bucket
  • Ash bucket (for placing items to slow cool)
  • Canvas bags of various tools including files, punches, pliers, jigs etc..


While I wasn't formally offering a class I indicated that I'd be working on some demo pieces and anyone willing to play could come join me.  I had four different folks actually take me up on the offer.  We made some S-Hooks and wall hooks.

Here are some random pictures of the students and their work.  Unfortunately I was an attentive instructor so I didn't take as many pictures as i would have liked at the first event.


I was able to get a lot of my own projects done as well.  I will have to take more photos of the pieces later to post in a separate post.