Pages

Showing posts with label Blacksmithing. Show all posts

Thursday, May 28, 2015

A Bit of Blacksmithing - Inside/Outside Calipers (Dividers)

Here is the coal forge I was working on for this project.  An 1890's style rivet forge.  I started the fire with a bit of wood chips and ran the forge with coal.


Today's project would include 2 tools which are very much the same in their construction.  Inside and outside calipers.  Calipers are a device used to measure the distance between two opposite sides of an object. The inside calipers (number 1 below) measure the inside of a closed space such as the inside diameter of a pipe.  Outside calipers (number 2 below) can be used to measure the diameter of the outside of the pipe.


Inside Calipers

I started by making the inside calipers with some scrap metal from the shop.  I began like I begin many projects by sketching my idea on the face of the anvil with soapstone.  Eventually I will be placing hot metal on the surface of the anvil but the sketch will last long enough for me to make both halves the same size and shape.  I started with rectangular stock about 1/8th by 1/4 inch thick.  Rather than working two separate pieces I simply drew out and shaped each end of the metal matching them to the sketch on the anvil.  Once they appeared balanced and even I cut the stock in half.


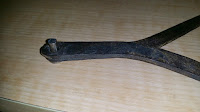
After cutting to length I punched a hole in the ends of each piece and test fitted them using a small nail.  I had to do a small bit of filing to remove some small burs and then I used the cut nail to permanently rivet the calipers together.


Outside Calipers

The process of creating the outside calipers was basically the same except that stock I started with was round.  I found this old S-hook left from a previous class at the shop.  I started by straightening it out for my purposes.


I again sketched my idea on the face of the anvil and went to work shaping 2 pieces to match the sketch.


 Once nearly done I made sure that both pieces were as much alike as I could manage and then proceeded to punch the hold for the rivet.


So far so good.  I again used a small nail to do the test fit.


Once satisfied with the fit I cut the nail off and made a small leather washer which I oiled and placed between the pieces.
  

Once riveted up I did a small amount of file work on the tips to ensure proper alignment.  I peened the rivet over just enough to be snug when in use but not too tight as to stick too much.


A Bit of Blacksmithing - Flat Jaw Pliers


I once did a pin making demo and somebody made a comment about the fact that I was using a modern set of pliers.  I had removed the plastic on the handles to make them look as period as possible but some people ...

Anyway, since then this project has been on my list.  I wanted to create a period pair of needle nosed pliers.  I was also looking for a bit of practice doing the hinge which can also be used on tongs and other such tools.  I was well into the process and forgot to take step by step photos until nearly the end.

I started by placing my hand on the anvil and tracing the shape of my hand.  You'll see in the finished pliers that they are not symmetrical.  As it turns out they fit my hand perfectly and I believe if they were perfectly symmetrical they would not be as comfortable in the palm of my hand.  Once shaped and fitted I did a small bit of filing to ensure the joint was a good fit.  I then used a small nut and bolt to do the test fitting.


I placed the jaws of the pliers in the vice while still a bit warm so that I could tweak the alignment of the handle.


I quenched the pliers and tested the feel in my hand.  Once satisfied I removed the nut and bolt and used a nail to fashion a rivet which I peened over cold to complete the pliers.


I was so happy with the production that I immediately started making a pair of scroll pliers as well using all the same principles except that the tip of the pliers were rounded instead of flat jaws.


I was happy enough to finish the two halves of the pliers but ran out of energy and daylight before I completed them.  I'll come back to them some other time.


Monday, September 17, 2012

Not much to say on this one but here goes.  Attended a Metal and Glass Symposium and somebody was teaching a class on how to make arrow heads.  I've done enough blacksmithing in the past, but never really tried this sort of project.  I've seen it done, but never had my hand in on the project.  Was really fun to try and I'd like to give it a little more time at my home forge.  The class was rather slow moving since there were about 8 people all working off one small charcoal forge.  Only one anvil to work with and the instructor was trying to keep everyone on the same pace.  Now that I've done it once I think I should be able to whip these out rather quickly.  


This one didn't match any period example.  In fact, the instructor didn't have an example to copy either.  He was making a piece and we simply copied his steps.  In hind sight I think I would have liked seeing some extant examples on display to try and copy.  I think this point is a bit long, but seems well balanced.

The opening didn't match up as much as I would have liked.  Wanted to go in for another heat and clean it up, but he was behind schedule and sort of pushed things along.  Oh well, I've learned the steps and hopefully will do this again soon.


Friday, April 1, 2011

My first A&S competition is done!

Well it is all over. I have survived my first A&S competition. While I debated with myself long and hard about if and what I should enter, I did end up submitting five entries. These are all items which I have at least mentioned here in the past. I am proud and a little embarrassed to say that all five entries scored a first place and are now eligible to submit in the Kingdom A&S competition.


The five entries I submitted are as follows:

Blacksmithed Round Jaw Tongs
Division III - Ironworking and Tool making

Late Period Ruff
Division II - Costume: Single Component

Plain White Linen Shirt
Division II - Costume: Single Component

The Suit: A 16th Century Man’s Red & Black Outfit
(Consisted of Leather Doublet And Slops, Black Flat Cap, Leather Belt And Pouch, Red Silk Sleeves, Red Worked Chemise, Leather Cannons and Black Linen Tights)
Division II - Costume 1451-1600
 
Wrapped Buttons
Division II - Costume: Accessories


All in all I am quite pleased with the way things turned out. It was rather a hectic day though. I judged four entries throughout the day while also having all five of my entries judged face to face. Due to the fact that I'm not big on speaking in public, I found the face to face judging very stressful. I found myself feeling very queasy most of the day and I never did fully calm down until I was back at the hotel. I think next year if I submit entries I will not volunteer as a judge. Trying to balance my nerves with the nine items I was either judging or being judged on was very tiring.

My biggest shortcoming was my documentation. I suck at it. I hate it. I consider myself an artist and not a writer. I love to read, love to research, just hate the process of having to be a good research paper author to get a decent score. While that still sticks in my craw, I have already started planning for the pentathlon for next year. Let's just see how well that year of stress goes.

Friday, July 23, 2010

Latest blacksmithing projet - Maker's Marks and Gravers

Date: 2010-07: Graver - Engraving Tool - U Gouge (Breadth)

Another project born of necessity. I took a class on how to make a touch mark. To make the touch mark we first had to make our own engraving tool. I created this U gouge fron an old allen wrench. The wrench was ground down and shaped and then sharpened on a stone wheel. The handle was made from a peg from a coat rack. The brass ring was made from a gas ftting from a hardware store.


Date: 2010-07: Graver - Engraving Tool - V Gouge (Breadth)
Another project born of necessity. I took a class on how to make a touch mark. To make the touch mark we first had to make our own engraving tool. I created this V gouge fron an old metal file. It was ground down and polished and then mounted into a woodent handle.
[[ insert image later ]]


Date: 2010-07: Blacksmithing Touch Mark-Dove (Breadth)
The intent of this item was to be a similar style of an item found in the Mastermyr collection. I wanted to make a touch mark to use for marking leather goods, armor and blacksmithing projects. This maker's mark is a small dove which is part of my heraldic device. I am known as Ercc Glaison, of the Three Doves and so I wanted to be able to stamp my projects with either my initials or three doves. While this project had very little forging work, it was created as part of a blacksmithing class I took.

Date: 2010-07: Blacksmithing Touch Mark-Initials (Breadth)
The intent of this item was to be a similar style of an item found in the Mastermyr collection. I wanted to make a touch mark to use for marking leather goods, armor and blacksmithing projects. This maker's mark is a set of initials (EG3D). I am known as Ercc Glaison, of the Three Doves and so I wanted to be able to stamp my projects with either my initials or three doves. While this project had very little forging work, it was created as part of a blacksmithing class I took.

Wednesday, May 12, 2010

Blacksmithed round hot punch

This hot punch was made from N7 steel.  I needed a 3/8 in round punch to punch the tongs I would be making later in the day.  This type of steel has a portion of chrome in it and is air hardening.  I did most of the shaping of the tip and then drew the rest of the stock out and shaped it into octagon.


Here is the piece air hardening.  Heated up to temp and then rested on some firebricks while it cooled.


 Cleaned up this is the finished piece.

This is the piece after the final heat.  I had to bake it for 2 hours at 450~500 degrees and thus the nice bluish purple color.  Pretty huh?

This is the stock we started with.  It was a piece off of an old tractor.

This is a piece the instructor showed us.  He did a demo on how to form each side and then let us go.  He made flat jaw tongs, but I opted to go with a round jaw that would fit a large portion of the round stock I have at home.

Here is my first formed piece


Here is the matching side I made.  The second half was a bit of a rush.  I had to wrap things up as the class day was ending.  I reworked it a bit the following week before punching the hole.  The idea is that both pieces should look the same.  You can also see a flat jaw tong which I started as an extra project made from some flat stock.  I used a pattern I spotted on a YouTube video.
Here are the pieces a little more cleaned up and shaped to match before punching.

Here are the matching sides after they were cleaned up and punched.  I got to use the round punch to make the holes.  The round punch was a project from earlier in the day.

Here are the finished round and flat jaw tongs.  I made a small elbow shaped piece to fit into the pritchet hole.  When my round tongs were almost done, I heated them up and hammered the jaws closed around the piece so that the jaws would fit well on that sized stock when completed.  My camera ran out of space and so I was unable to take all the photos of the flat stock and riveting.  I used a standard 3/8 inch mild steel rivet for both tongs and just peened the rivet closed while cold.  The flat jaw tongs hold 1/4 inch stock.  The round jaw will hold 3/8-1/2 stock very well.