
The intent of this post is to be used as a class handout for a future workshop. I have recently created four different "medieval" bound books. I had quite a bit of fun doing it. I am hoping to promote the idea of binding books to share the fun. This post will serve as the hand-out at the workshop is not intended to be a full blown research summary on book binding. Many others have done far better and much more comprehensive summaries already. There are much better sites where one can obtain a variety of instructions. I have decided to put together this post so that I can simply print it out and bring it to provide to potential students.
Class Title: Make and Take Bookbinding Workshop
Class Description: A hands on workshop allowing attendees to experience an introduction to one style of medieval book binding and take a fully bound medieval looking book home with them.
Experience Required: None
Class Length: The workshop is expected to take a full 2 hours. Some finish work may be required but attendee will leave with all materials required to complete the project.
Class Fee: $4
Tools & Consumables Provided:
- PVA Glue
- Saw
- Two template boards
- Two Clamps
- One heavy sewing needle
- Razor
- Plastic combs/brushes
- Cutting boards
- Sample Books
- Scissors
- Letter opener
Materials Provided:
- Handout
- Two drilled book boards
- Three cut natural fiber cords
- One set of unfolded folios
- Heavy cotton/linen string
- Waxed paper
- Leather
- Glass marble
Note: There will be a selection of pre-printed folios to select from. Folios are printed on standard white "copy" paper. The low cost materials used in the class are intended solely to get each attendee acquainted with the art of book binding. Attendees who are interested are fully encouraged to complete future projects using more period appropriate materials to suit their taste.
Cutting Templates
Some attendees may have more than one option to choose from with regards to the size of the book that they make. The following templates are provided for reference of some of the options. Each attendee will be provided with a printed copy of the templates which will be used to mark the lines for cutting the pages as well as for cutting the stitching holes as described later.
The quarter inch thick boards used for the covers will be drilled using the following template. The size of the holes drilled should be proportional to the size of the cordage being used to assemble the book. The cordage should be able to pass through the hole but fit very snuggly when pulled through. Most of the boards provided have a rounded over edge which can be easily accomplished with a quarter inch round over bit on a table top router.
Option 1


Construction Steps
Step 1 - Create Your Folios
For this class you will be using blank pages but you could have just as easily printed off pages from a manuscript which might look like the following:
You will be provided with a stack of cut pages. They were created by first folding an 8.5 x 11 inch piece of paper and cutting it in half. Each of those portions where then folded in half again and cut to result in the stack of pages provided.


You should collect five pages together and fold them into a folio. The resulting folio will contain 10 pages each. To assist in the folding I find that a standard letter opener or a hard object such as the flattened glass marble you have been provided with works well.


Step 2 - Create Stitching Holes
Your goal is to end up with a stack of neatly folded folios. For this class you will be combining your pages into a collection of eight folios. It is easy enough to add more folios but for the purposes of learning book binding I feel that you will learn what you need to know by sewing eight folios together.

I find it easiest to stack my paper on the table so that all the folded edges are aligned. Then place your book boards on either side of the pages. These are performing the role as spacers for now. You can then rest the 1/2 thick waste boards on either side of the paper.

Once you have the pages aligned and pressed between your waste boards you can clamp them and remove them from the spacers you were resting them on. Your pages should look something like the following.


Once the pages are clamped tightly you should use the template provided to mark the spacing of the sewing holes. Note that if you were binding your own book at home the spacing of theses lines is not all that critical. Later you might simply drill your book boards with holes to match. For this project, however, the spacing is critical as you will be provided with predrilled book boards. You will need your stitching lines to align with the boards you will be given.


Once the pages have been marked you may proceed to cut them with a small saw. Note that in period there were other methods used such as an awl. For the purposes of this class, however, we will be using this approach to expedite the process. The saw cuts should go just deep enough to penetrate the innermost page of the folios and no more. Using the paper provided you will find that a cut as shallow as 1/16th of an inch should be sufficient.


Once you are done cutting you should have a set of pages that looks something like the following:


You can now remove the clamps and set them aside. If you open up the folios you should now see a small cut on each set of pages which will be the stitching holes that you will be sewing through.


Step 3 - Stitching the Book Together
After completing all the five cuts you may remove the clamps and separate the folios. Keep them in the correct order as you begin to prepare them for sewing. Period bookbinders had available a contraption, some refer to as a sewing frame, to hold the folios in place as they were stitched together. The books bound in this workshop are small enough that you should be able to assemble them without such a device. Each folio should be stitched in the direction you see in the image below. Your first folio will be stitched right to left. The second folio will be stitched left to right and so on.
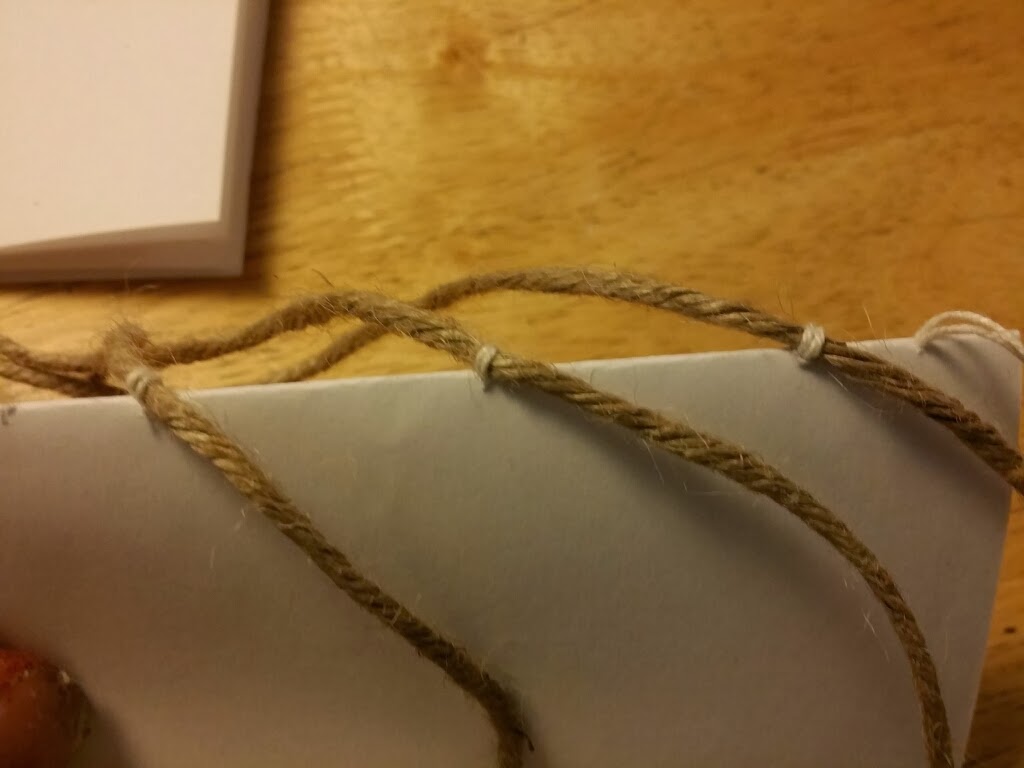
Here is the cordage you will be using for this project.

As you sew you might be compelled to pull tightly on the string. If you do not follow the arrows on the above drawing you might find that the tension will not be on the cord but rather the page itself. When you pull the string tight you will tear your pages. It is important to remember to always exit under the cord and come back over the top and through the page.


Once you get to the end of one folio you will exit at the 5th hole and enter into the very next folio.


As you add your third folio and every subsequent folio after that you will be chain stitching the next folio to the previous two. As illustrated in the following image you can see that the third folio is attach to the 1st and 2nd. The fourth folio is attached to the 2nd and 3rd. I have found that neatness in this regard is not entirely paramount to the success of your project. Remember that you will be covering this entire back with a leather cover which may hide any imperfections in your stitching.

Once you get to the end of your final folio you might feel compelled to tie off with a knot. I have found that a even a small knot might be visible as a lump when you apply the leather cover. In the following image you will see such a knot. As small as this may seem when you firmly bind the leather to the outside this will show up as a lump in the finished binding.

It is better to simply run a row of stitches back along all of the folios to securely bind them together. You can simply cut the end off without knotting the final stitch.

The following images show a some additional options for binding which we will not attempt in the class but you might want to try on your own.
Over two cords with a sort of figure eight stitch.

Over a single heavier cord for a more pronounced look on the spine.

Over a split leather thong.


Step 4 - Cutting the Pages (OPTIONAL)
No matter how careful you are the folios will not match up exactly. The pages will have a rough and uneven look. You may leave them like that if you wish. If you like the look of the rough uncut pages you may skip the next two images. For the purposes of the workshop we will be skipping this step, however the approach will be demonstrated so that you may try it on your own at home.Begin by sandwiching your book between your waste boards ensuring that they are even and flush along the folded edges of the folio. Apply two clamps to your sandwich and cut along the edge as depicted in the dotted red line in the following image.
In period there were special tools for this sort of thing but with a book this size I found that clamping the book between boards to work just fine.


It helps if you allow one of the waste boards to protrude a little further than the other one. This will serve as the back and ultimately the "cutting board" If you fail to allow one board to protrude more I found that getting the pages completely straight and smooth was more difficult. I recommend you try and see what works best for you.


After you finish trimming all the strips of confetti off you can go back with your knife and carve any sections which were not completely smooth. You will find that the compressed pages carve much like a very soft wood.


After doing a few using the clamps you see above I tried some with the "c-clamps" instead. I found that these work much easier. I was able to tighten them down considerably more which made the cutting much easier. The finished product looked much the same but the process was much easier when done like the following images.


Keep in mind that you need to use a very sharp razor to shave the pages. Try to only cut a few pages at a time until you have cut all the uneven edges flush. If you try and press harder to cut more an accident will be more likely. With a book of 150 pages this can be accomplished in only a few minutes so take your time and avoid mistakes or accidents by trying to cut too much at any one time.
Step 5 - Mounting to the Book Boards
You will now run the hemp cordage through the pre-cut holes on the oak planks. You will find that the cords you were provided with have hardened ends. I dipped each cord into a small amount of white glue so that the tips would serve as their own needle and be easier to guide through the holes in the boards. I recommend this if you plan on doing this on your own. Your other option is to use a large needle that your cord might fit through and use that to feed the cord through the holes. I found that any needle I had which would fit the cord would also be too large to easily fit through the holes on the book board.To prepare your boards I cut them using the template you have been provided. The position of the three holes which align with the stitching is important. The two next to each of those hole isn't quite as important. You will note that my drilling was quick and not all too precise. As they will be covered with leather nobody will ever know. You will note on the following image that I also took away some material between the holes. I removed a shallow valley between holes to allow a place for the cordage to sit without protruding and causing a lump beneath the leather cover.


Here is a close up of a hand drilled and carefully carved set of holes. Once covered in leather nobody will know which was cut more neatly so use your own judgement when doing this project at home in the future.

You will run the cord through the holes so that the end of the cord exits on what will become the inside of front and back covers. Once fully fed through the outside will look like this.


The following is an optional step you may want to experiment with on your own. I tried this on only one book I've done. Some of my books have a small dimple where the holes were drilled. In an attempt to hide that hole I simply glued a piece of paper over each hole. As the glue was almost dry I burnished the surface with my marble to smooth out the surface as much as possible. This prevented the dimpling on the finished cover but the result is completely dependent on your personal preference.


Step 6 - Covering Your Book with Leather
 For our class you will be offered a small selection of leather scraps to use. Most were collected from Salvation Army coats. An average man's coat will provide enough leather for 8~10 books depending on the size of the coat and the size of the book. There are also some scraps of leather purchased from Tandy Leather. If purchasing your own leather you will need enough to go around the outside and overlap each edge by about three quarters of an inch. You will also need a small scrap for the inside and outside cover as you will see below.
In the following examples I was dabbling with the idea of binding in wool rather than leather. The process I used was the same although I should have used a bit less glue to prevent soak through.
You will be provided with a piece of precut leather. Apply a small amount of glue to the back of the book along the spine. Use your finger to work the glue in between the folios and around the cordage so that when the binding cover is applied the glue will form a tight bond. For glue you will require a glue which will remain flexible even after drying. I will need to adhere to leather, paper and fiber. Book binding requires what is currently called PVA glue (Polyvinyl Acetate). For the class you will be using the following which can be found at Hobby Lobby or Michaels.


You can either smear the glue directly onto the leather, or as I prefer place the glue on the wooden boards. I find that by gluing the boards you have better control. I glued the cover to the spine first and stretched it until I was satisfied and then moved on to the boards. I can do one side and once I am satisfied move onto the other without risk of the glue drying to fast.
Experiment and see which works best for you.


Once you have glued each side and folded the corners over your book should look something like the following. The joys of working with PVA glue is that you can work the material or leather while the glue is very tacky. You can squeeze the corner and shape it until you are satisfied. Once it is shaped the way you like it you will use scissors to trim the rest of the fabric or leather away. The glue will continue to hold and is easy enough to cut through.

The neatness of your folded over edges should not concern you. As this is your first book and we are under a time constraint I would be surprised if anyone's book looks perfectly even on the inside covers. What you will do next is apply another piece of material to the inside of each end of the book. I apply a small bead of glue along the endge and smear it around evenly.


You will then apply a scrap piece of material to the glue and work it into the corners. You should be able to do this while the glue is tacky. Using your finger nails you should be able to work along to define an edge for your cut line. You can then work along that edge and trim the excess off.

You can now see that the neatness and straightness of your lines is not at all important. As long as you have an even covering the seams will all be hidden. At this point you should apply a layer of waxed paper to protect your loose pages and press the book to dry.


Here you see the drying book pressed between boards. You can place it under a big weight or in a set of clamps. You will also notice here that the glue seeped through the material. Ugh!

You can work the cover while it is tacky with your finger nails. Press in along the cord to form a crisp line and define each cord if you like. Once the glue dries it will retain this shape and yet be flexible. Again the joys of PVA glue.

All that is left now is to glue on and end page. If this were a printed book you might add an end page to hide your fabric or leather inside covers. For this project you can simply apply a small amount of glue to the first and last page and glue it to the cover itself. This will hide your ugly seams and create a nice crisp edge along the front and back cover.
Let dry for a few hours and enjoy!
______________________________________________________________
This post is intended to be used as a supplement to a hands on workshop. If you have a any ideas or feedback as you read through this post I would love to hear it.
Please send them to ercc.glaison@gmail.com