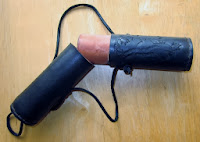
I found the recipient's heraldic device as registered with the SCA. I sketched it out and then transcribed it onto the leather that I would use for the penner. I did most of the shallow tooling prior to any stitching.
Once satisfied with the tooling I wrapped the piece with paper and then used some painter's tape to hold it in place while it dried. The penner is made of two layers. The center layer was already constructed. See previous blog entry (Penner) for further details on the manner in which it was created.
I wrapped the tooled leather shell around the center and taped it in place with painter's tape. I find that this works well to hold it in place without leaving any residue which impact the later dyeing step.
Stitching completed. The gap in the stitching will become the location of the slit which will allow the cover to be removed.
I placed a round piece of leather on each cap and then trimmed to fit.
Once in place I began piercing holes and stitching it on.
After cutting the lid free from the body I made a few slits on the sides where the hanging strap would be slipped through. I did this while the leather was a little damp. I used a leather tool to open the hole up a little and then fed the strap through.
Fully assembled and ready for dye. I used a vinegaroon which I created previously. It makes an outstanding dye. Simply placing steel wool into a bath of vinegar and water. The steel will rust and make a very ugly muddy looking solution. When applied to the leather it soaks in and quickly turns black. This piece took two coats, but turned a nice rich black easy enough.
The pen knife you see in the following picture was created in exactly the same way as the one that I carried to Pennsic. See blog entry (Pen Knife and Goos Feather Quills) for further info on how I created the knife.
The penner was finished off with a couple layers of olive oil and beeswax.


