Pages

Wednesday, July 24, 2013

Waxed Tablets

Waxed tablets continued.  I started this project a while back and used three planks as a template to build the case around.  The planks I had used were cracked during the construction of the case.  I replaced the planks with the ones you see below. 


Two planks are 1/4 inch and one thicker version.  I wanted the planks to be bound together like a book and planned on cutting a wax pit on both sides of the thicker board.

Here you see the planks cut, smoothed and rounded out.  I sketched the shape of where the wax pits would go.  I also sketched the holes where the planks would be bound.

I cheated once again.  Time crunch, sorry, but I used a power tool.  I used a small electric pannel cutter to rough out the shape of the wax pits on each plank.

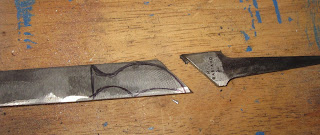
During the removal process I messed up one plank.  You see below a small section where I cracked the board.  Rather than starting over I decided to repare the damage.  I took another piece of oak and cut it down to a rough shape.

I used carving knives to get the piece to shape and then glued it into place.


Now to continue digging out the wax pits.

Roughed out with a power tool, but the detail work would still be done by hand.  I used the V-gouge you see below to straighten out the lines and smooth out the cut.  You can see the board I use for carving.  It is a 20 year old pine board with some wood pegs inserted.  I can use the pegs to hold my piece in place while I push against the piece carving.


You can see the side view of my board below.  It has a small lip to catch the edge of the table to hold it in place while I work. 

Finished pannels.  I used both a gouge and a knife to score some cuts in the bottom of the wax pit.  I figured the cuts would help allow the melted wax a surface to grab onto.


All three pannels cut and ready for filling up.
 

I tied the planks together to get a feel for the look when assembled.  So far, so good.  I then cut the cords to fill them up.


I melted the bees wax using the same set-up I used for making the leather canteen.  I used a small ladle to scoop out wax and fill the pit.  After filling the first one I got better at it.  Definite learning curve on this task.


After they were all filled up I let them cool and harden and then tied them togther again.  One pit was over filled and one under filled.  I could shave down the over filled one easy enough, but the under filled one posed a problem.  I used the stylus (created later) to smooth it out enough to use so I'm not sure I'll fill it in all the way.

Wanted to make sure when closed and bound the planks would still fit in the case. 
Yup, so far so good.

Can you read it?  Not too easy to read is it.  Oh well.  Maybe next time I should darken the wax.

"HELLO WORLD"


Not sure what I'll use to bind permanently yet, I decided to move on to carving the space for the stylus.  I set the stylus in place and sketched the shape out. 

Before carving I went back and worked the styus a bit more.  The version created earlier didn't quite have the right "spoon" effect which made erasing tough.  I went back and reshaped it and then polished it up a bit.


Some day I want a bone stylus, but no time.  For now this brass one will have to do.

Placed in position and carving begun.  I didn't want to risk power tools at this point so this portion was done by hand.

Cut, smoothed and finished up.

Now onto a better binding material.  Leather perhaps?  I took the collar off a recycled Salvation Army coat and planned on using it.


I cut it into strips and bound the planks together.  Looked OK,

Yes, I like the look, but the problem I faces was the knot.  I no longer could fit the tablets into the case since the knot on the leather was too larger.   Cut these off and try again.


After trying another version of leather I went back to the hemp cord.  Took two attempts here as well.  First attempt was too tight.  I couldn't flip the pannels open like a book.  Cut and made it a bit more loose the secone time.  I guess the following will have to do.

DONE!

Added a strap to the case and ready to take to war now. 


Final note.  I don't like the wax color.  I melted a big pot and didn't want to tint it.  In hind sight I should have darkened the wax.  It is really tough to read the wax as light as it is.  I may later melt off and refill with wax tinted darker with some charcoal.   Not this time though.  No time.

Spool

On a kick of projects involving splitting wood and making stuff out of it.  This project fell in line with a handfull of other projects recently done using wood from a friends pear tree cut down last fall.  The branch you see below was my starting piece.


I used a hand saw to cut about a 2 inch section. 


One good wack with an axe and we have a split.

I wasn't bold enough to wack it a second time.  I placed the axe along the line I wanted cut and tapped with a hammer twice.  Three hits to make three sections below.

I took the middle section and did a little smoothing with a small hand plainer.

After smooth I used a hand carving knife to cut into the shape you see below.

More shaping, but no sanding.  I used a carving knife to ensure that all the sharp edges were gone and no spliters would snag my thread.


Done!  Oiled it up a bit with some olive oil.  I let sit a while and then filled up the spool with 50 meters of white linen thread.  I made a small V-cut in the end to feed the end of the thread through.  this will hold the end in place when not in use.

Pen Knife and Goose Feather Quills

What is a friar or a monk without a scribal kit right?  Well I wanted mostly for a method to write in my journal.  I like the idea of looking like a period scribe at the event, but journaling was the primary reason.  To write one needs a pen.  To make a pen one needs feathers and a knife.  To make a knife one needs a metal file and some bones.

I bought the following metal file from a flea market for about 75 cents.  Rock on!  The guy laughed at me when I asked for a "bulk" rate.  I bought about 20 files, a couple old hatchets and some other stuff.  He said "you must do a lot of wood work?"   I didn't have the heart to point out that these were metal files.  I told him that I was planning on making medieval knives out of them.  He looked at me like either he was drunk or I was.  We were both happy with our end of the bargain and that made for a good day.


Taking the rusty metal file I put it to the grinder for about 5 minutes to take off the rust and smooth our the metal ridges.

Since the edges are the only part that will show I spent more time assuring that those side had no sign of the prior life as a file.

I sketched out the shape of the knife on the blank and proceeded to cut it and grind it to shape.  Note that I could have worked the piece hot, but the benefit of using metal files is that as long as you keep the piece cool, quence often and don't over work you have a VERY hard piece of metal.  I didn't want to lose the heat treatment so I worked the piece bare handed.  Whenever it got warm to the touch I wet it again.  This was key to keeping the temper.

I cut this with a angle grinder with a cutting bit.  I kept spraying with water while cutting to keep cool.

After cutting I used the bench grinder to bring it to shape.

I then moved to a sander to fine toon the shape and help hone the edge.  I also refocused the bod of the blade to make sure it was semetrical.  I marked the pin placement and began drilling the pin holes.  Note this part was the worst.  The metal IS VERY hard as I have stated.  That makes drilling very tough.  I used a metal bit with diamond chips and it still took about 5 minutes of slow drilling to complete each hole.

Metal done-ish for now.  Move on to the bones.  Ox bone plates cut to shape.  This is the first set.  As you will see later, I broke this set.

Bone plates cut to shape, now to go back and work the blade some more.


Blade cleaned up as much as possible without the hinderance of the bone handle getting in the way of the sander.  I cut a small brass 1/8th inch rod into sections about 1/16th of an inch longer on each side of the handle.

I peened the brass pins down to hold the bones in place.

I first filed the brass pin flat to allow for an easy surface to start peening over.

... AND... here is the fail.  Missed the pin and cracked the bone.  I did the same thing earlier on the paternoster too. 


Two fails in the same day.  I used a cut off bit on my dremel to cut off the head of the pin.  I then used the punch you see below to push the pin out of the knife.


Round two.  Same approach, differant bones.


Cut and ground and sanded and peened.  Better this time.  No cracks.  I haven't finished polishing the blade and yet it is still sharp enough to shave with.  Yeah!  I love a sharp blade.

Now to play with some quills.  These are some feathers I collected with my kids around a local pond.


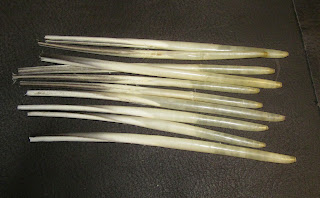
I sorted them out and cut the following to length.  I took only the largest, straightest ones for quills.  I used my new knife to remove the fletching from the shaft.

I heated up a bucket of clean sand in a cast iron pot and then used that hot sand to cure the quills and harden them. 


No detail pics of the cut quills.  I have tried about 1/2 the ones you see below and find that it is much HARDER than I thought.  I plan on taking a class about it during Pennsic.  Not sure if I am doing somethign wrong or if there is an issue with my quills.  They look great when cut, but are way too flexible to write with.   Oh well.... I tried.

Finished penner and quills.