Pages

Thursday, September 11, 2014

A Bit of Blacksmithing

I've really been spending quite a bit of time towards of the end of this summer playing with metal.  I have attended my first event with my blacksmithing setup.  While I REALLY enjoy doing metal work it can be a rather large pain in the butt moving all the heavy stuff around.  I unloaded everything back to the garage for a week and then decided to attend a couple more events with the my metal working stuff.  I had two more events one week apart so I simply left all my stuff in the car for the week.  After the last event I'm not sure I'll load it all up again any time soon to take to an event.

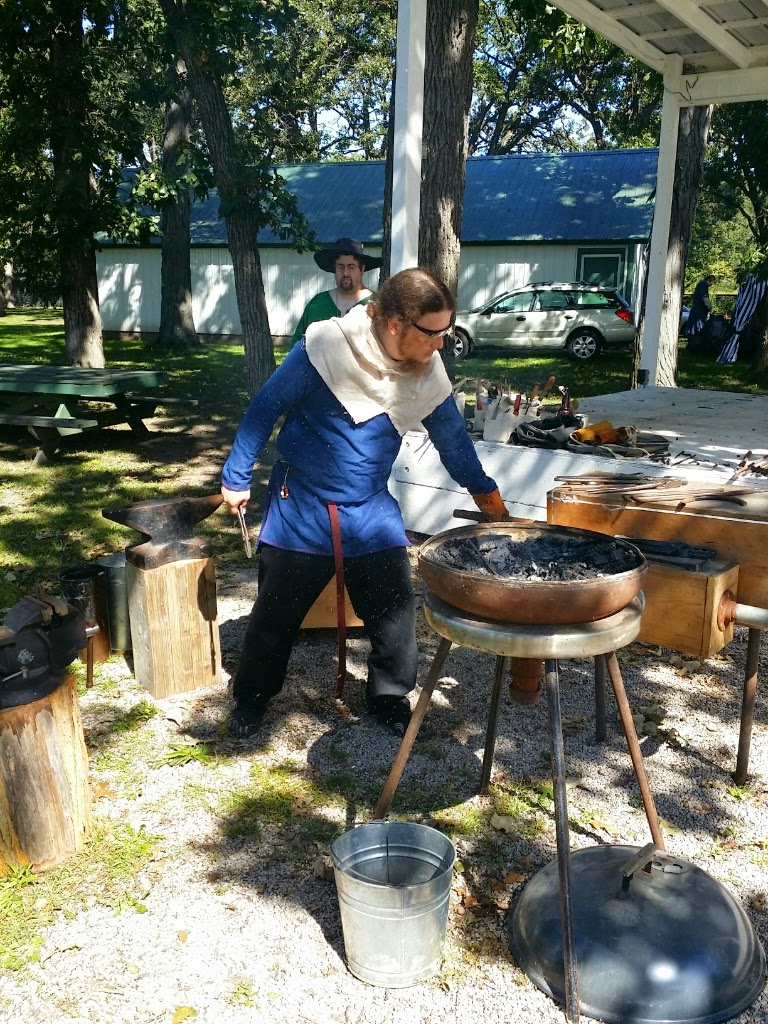
Here are a few pics of my basic setup.

I use a coal forge with a large Japanese style double action box bellow.  The bellows produces a good volume of air on both the push and the pull.  I purchased the setup from an SCA gentleman who was moving and didn't want to make the move with all his heavy stuff.  The large anvil you see in the foreground belongs to the site where I was working that day.


I typically use hardwood charcoal to start the fire and then switch to coal for the majority of the work.  I lined my forge with a portland mix and then coated it with a layer of refractory cement.  It makes for a rather heavy forge but it works great.  One small modification I plan on doing is to cut a gap in the lip of the forge to allow for longer pieces to lay flat across the fire.  I find that heating a long piece requires a wasteful stack of coal to get the heat up.  If i lower the edge I should be able to get even a flat piece down closer to the hottest section of the fire.


Here is the setup at the second event I attended.
My basic setup includes the following:

  • Forge 
  • Bellows
  • Large vise mounted to a chunk of very heavy osage
  • Anvil
  • Anvil stand made from 2X10 planks sandwiched and screwed together
  • Wooden box for storage and using as a table for my tongs and hammers
  • Small collection of hammers
  • Small collection of tongs
  • Coal bucket
  • Water bucket
  • Ash bucket (for placing items to slow cool)
  • Canvas bags of various tools including files, punches, pliers, jigs etc..


While I wasn't formally offering a class I indicated that I'd be working on some demo pieces and anyone willing to play could come join me.  I had four different folks actually take me up on the offer.  We made some S-Hooks and wall hooks.

Here are some random pictures of the students and their work.  Unfortunately I was an attentive instructor so I didn't take as many pictures as i would have liked at the first event.


I was able to get a lot of my own projects done as well.  I will have to take more photos of the pieces later to post in a separate post.


Creating Leather and Wooden Card Weaving Cards

While I initially had no intention of trying card weaving I have found myself giving it a go.  A friend was going to attend a demo and asked for some more period looking cards.  She didn't like the modern playing cards she currently used and wanted a set of wooden ones.  I thought I'd give it a try.
I started with a chunk of wood from an old pallet.


I drilled holes in the block with the intent of making two different sized cards.


I then used a table saw to cut the block into fins which I could then cut off all at one time.


I also tried the same process on a block that had not yet been drilled to see if I could make the cards and then drill them.


I took the cards to my belt sander and rounded the edges.  I used a Dremel to soften the inside of each of the holes.  As it turns out, the woman I made them for found that there were still a number of burs on the wood and therefore they didn't work nicely.  I'll try sanding them again and perhaps varnishing them to make a better finish.


Sanded cards ready for use?  Nope.  I recall that when my friend is doing weaving there are numbers on each of the holes.


I used a wood burner to make roman numbers on the cards for use when warping and patterning.


 My friend had also mentioned that perhaps leather cards might have been used.  I tried my hand at making some of those as well.


My first batch included trying to harden them in hot water but that was a fail!  As I recalled the cards my friend used were playing cards.  Leather is about as stiff as a playing card so I decided to scrap the leather hardening adventure and just toss these.


 Turns out that the leather cards were about the same thickness as the oak cards.


 I cut some leather squares from scraps in the basement.  I then used a small knife to round the edges.


I then drilled the cards and used my dove makers mark in the middle.


I then used a wood burner to mark the holes as I did on the oak cards.


And... just for the heck of it I tried making some triangle shaped cards.  The process is the same, only the shape differed.


For the heck of it I thought I'd give the triangle cards a go.


Well, how did the experiment with the triangle cards go?  It was not good.  Not good at all!  That is all I shall say on that matter.  Card weaving... YUCK!


Building an Inkle loom and Doing A Bit of Weaving

I've been very busy doing lots of stuff lately.  I have a ton of pictures which have simply been waiting to be uploaded.  With summer drawing to a close soon I've been spending as much time on my outside projects as I can.  While doing that, however, I found some time to do a bit of weaving.

I had seen some looms in the past but clearly I didn't use any pattern for the one I have made.  Follow along and you'll understand why I say that.

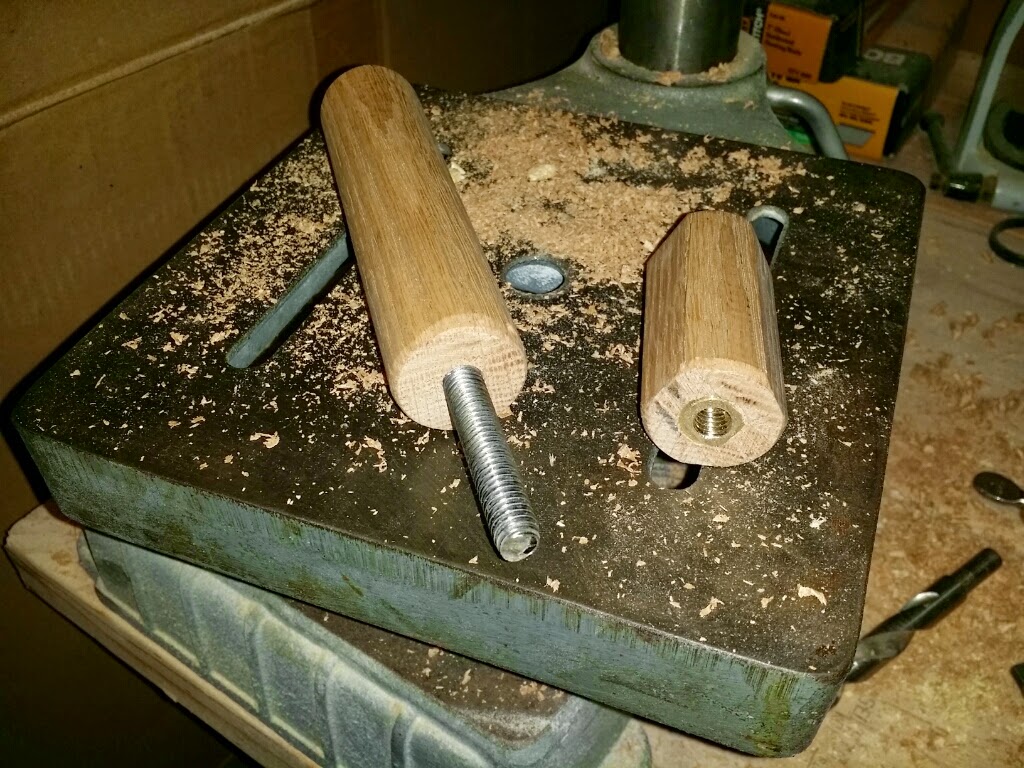
To create the knob I drilled a large hole in the dowel and then a smaller, deeper hole to allow the bolt to penetrate into.  I then insert a threaded brass fitting which would allow the dowel to become a threaded knob while hiding all the metal pieces.


The construction was done with oak planks from Home Depot.  I used basic lap joints and peg and dowel assembly so that no metal fasteners would be visible on the completed loom.


After dry fitting I glued and clamped the loom.


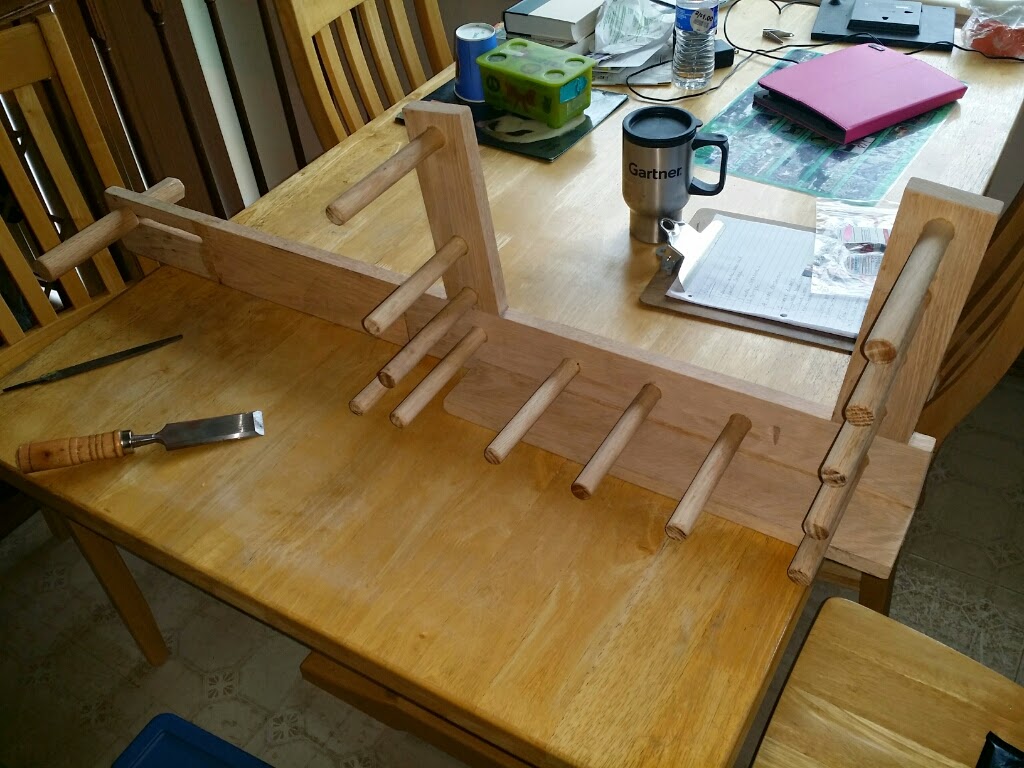
After loom assembly I placed some cut dowels in a random spacing.  Here is the major fail of the project.  I tried to place as many dowels as possible.  The more dowels used, the longer the weaving could be.  What I didn't do is factor in the layout of the cordage.  The dimensions of my loom would not properly allow for that many dowels.  To operate the loom the weaver must be able to separate the warp threads and the proximity of the dowel placement prevented the proper operation of the loom.  I didn't find that out until the entire loom was done and I tried to warp it!


Dowel placement was marked and a drill press was used to make all of the holes.


After a dry fit all the dowels were glued into place.


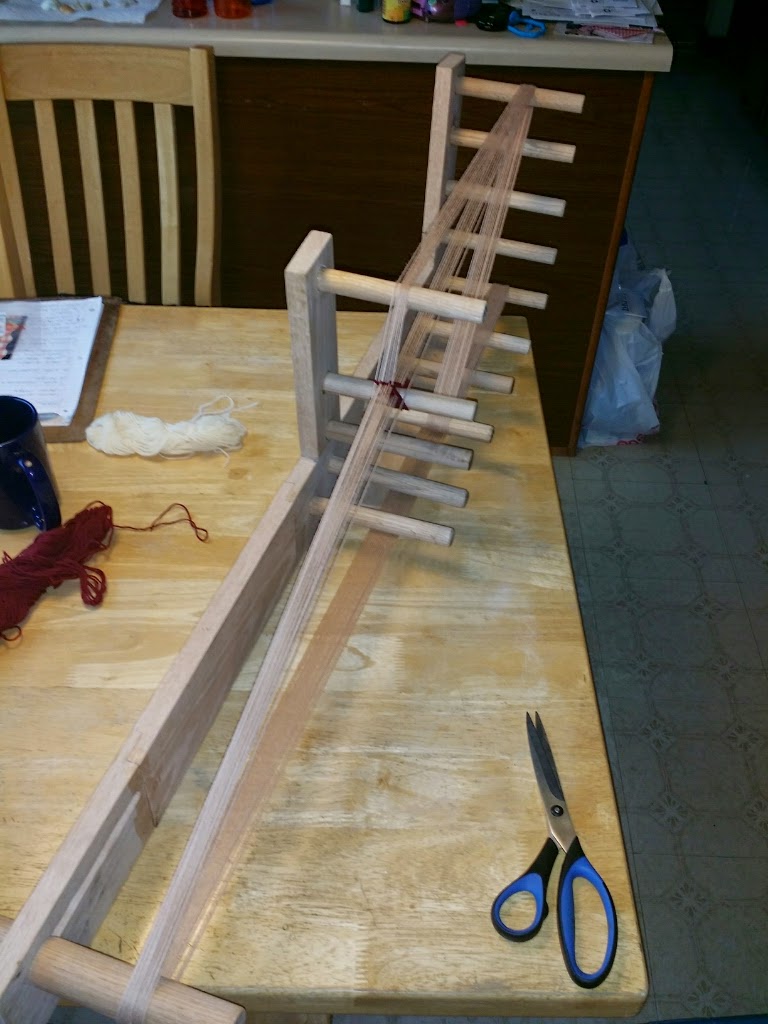
At this point I thought I was done.  This picture was taken at a friends house.  She tried to help me warp my new loom and that's when we discovered the design flaw.  By not using a proper pattern the knob you see on the right of the following picture was MUCH too close to the rest of the loom.  The style of the design wasn't the problem but the size was.  I remembered the looms I had seen in person and made mine about twice as large as it probably should have been.  To resolve the problem I would have to extend the board where the knob was inserted.


I made a cut between the knob and the rest of the loom.  I then inserted about a 12 inch board using lap joints to extend the length of the loom.


Here you can see the spliced piece extending the loom.    The loom is now incredibly long compared to others I've seen.  It seems to have worked out though.  As it turns out having spent a few dozen hours weaving on it, I rather like the size.  Having a loom where the heddle is about a full arm's length away gives more working room.  I can work on about 10~12 inches of weaving before I have to loosen the loom and rotate the warp threads around.  I think that if I HAD made a smaller loom I would have been disappointed and probably upscaled it eventually anyway.


For my first weaving I did a simple solid color.  I had recently received a large quantity of wool thread as a hand-me-down.  I started with a small size yarn to play.


Here is the shuttle I made from a piece of scrap maple.  I used a scroll saw to cut the shape and then used a Dremel to round out the corners.  You can see that I burned the wood a bit but I was in such a hurry to try it out I haven't yet fixed that.


OK... I'm hooked.


Second attempt involved same size thread, but a little more color this time around.


Yup... I'm hooked.


Third attempt.


This time a larger size yarn and a bit wider.


Now... what I really made the loom for in the first place.  I wanted custom tapes to be used for my greenwork shirt.  I wanted them to be mostly white with some green spots.  I wanted them to match the design of the shirt but be more custom that your average over the counter white linen tapes.

I used the following linen thread.


I wove a solid white tape to get a perspective on size and feasibility on my loom.  I like the result a lot but it was about twice as wide as I wanted.  I cut down the number of warp threads and did another run.


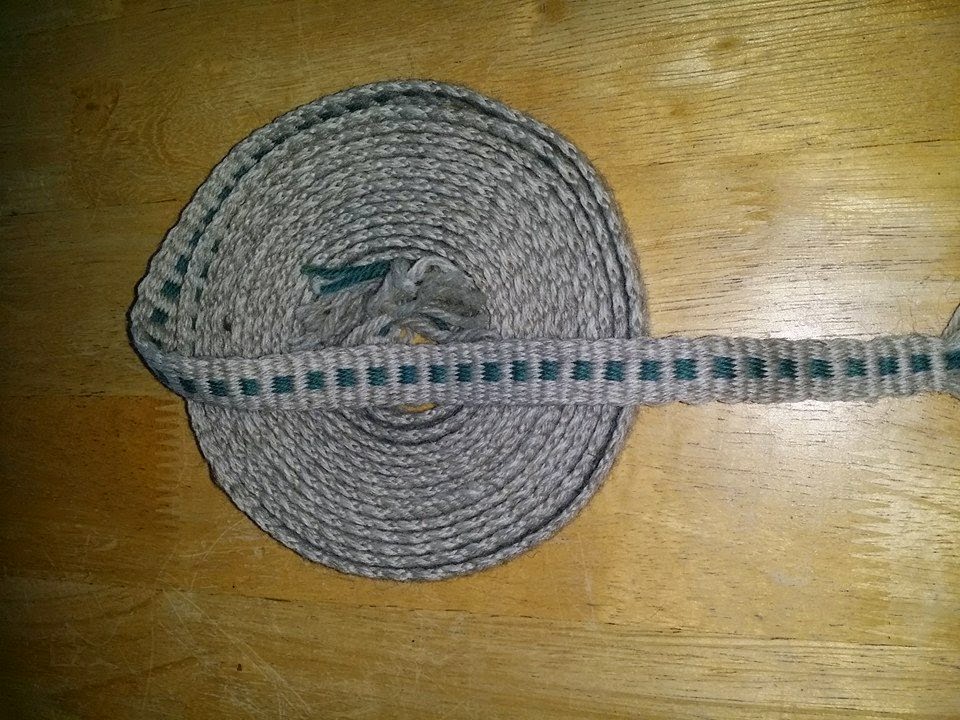
This time I used the same thread but included 2 strands of green linen as well to provide a specked green line on the tape.  I LOVE THE RESULT.  This was the primary reason I made the loom.  I needed this tape to finish my greenwork shirt and I really love the outcome.  This produced about 7 foot of usable tape.


I have since done about 20 weavings totaling a few hundred feet.  I have no idea what I'm going to do with it all yet.  I find it very relaxing to weave in the evenings while watching TV.  Now that football season has started I imagine I'll be making more with no real purpose.  :-)